Looking to learn how to draw an Easter bunny that’s both adorable and fun? You’re in the right place! Whether you’re just starting or already love sketching, this guide will help you turn simple lines into a charming bunny. Easter isn’t just about eggs—it’s also about creativity, color, and joy. Drawing a cute Easter bunny is a great way to celebrate the season while improving your art skills.
With our easy step-by-step instructions, you’ll see your bunny come to life in no time. Plus, this is perfect for teens, kids, or anyone feeling creative. All the tutorials on dooduko are designed to make drawing easy and exciting. Let’s hop right into it!
How to draw an easter bunny

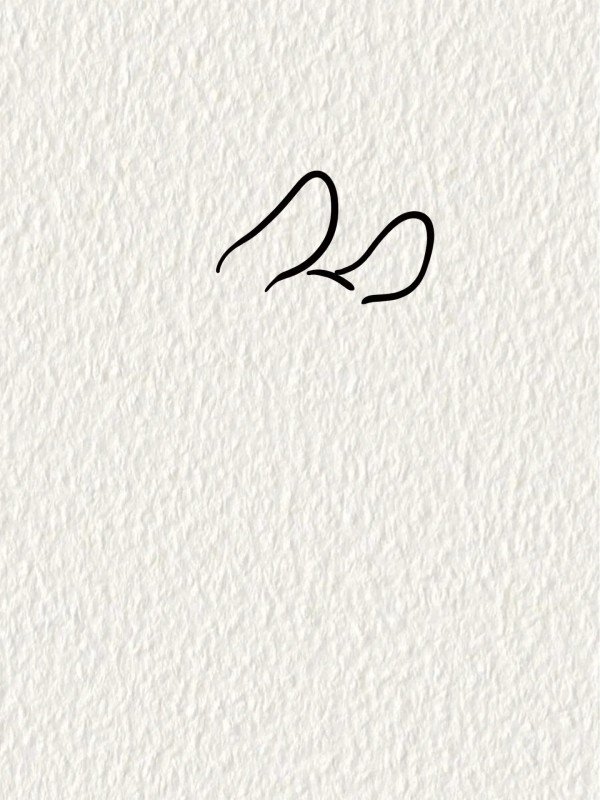
Step 1: Start by drawing two long, curved bunny ears close together at the top of the head. These will be the signature part of the Easter bunny.
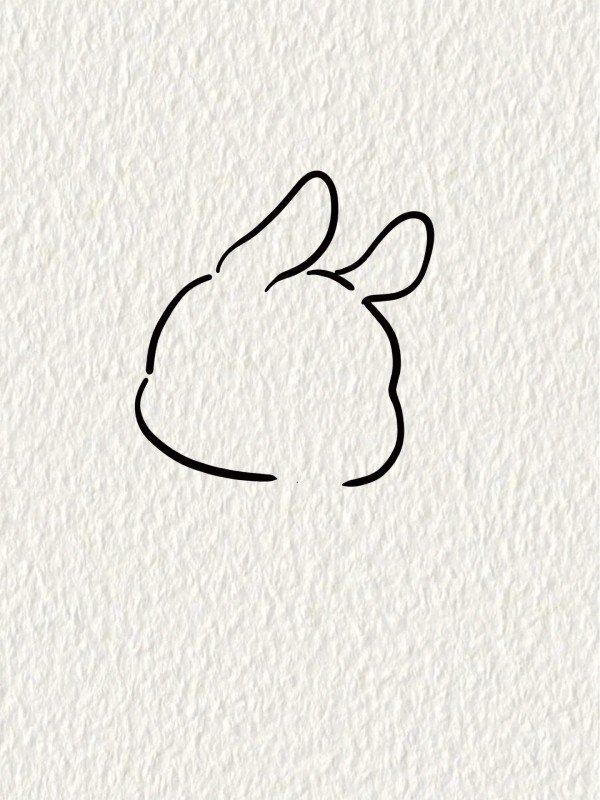
Step 2: Sketch the round head and cheek of the bunny, then draw the back and a small curved tail near the bottom. Keep the lines smooth and soft.
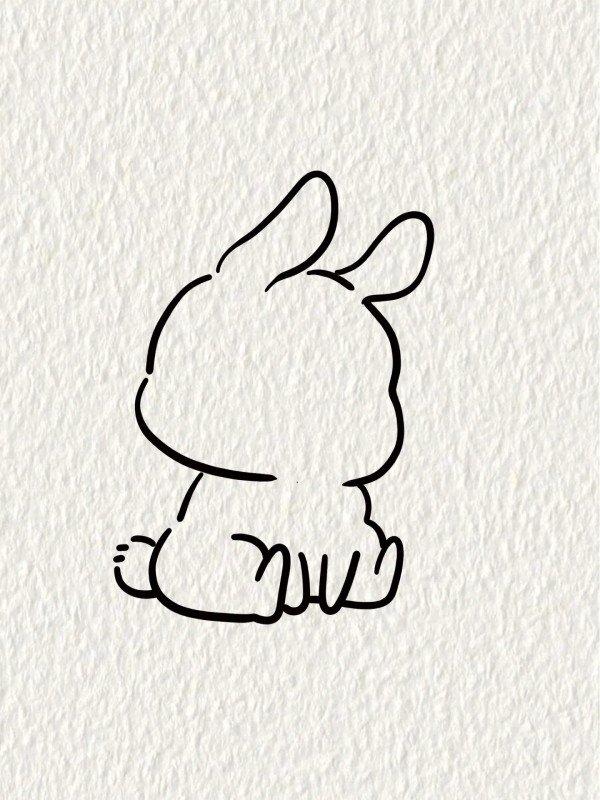
Step 3: Add the front paws folded in front of the bunny and draw a big oval foot behind. This gives the bunny a sitting posture.
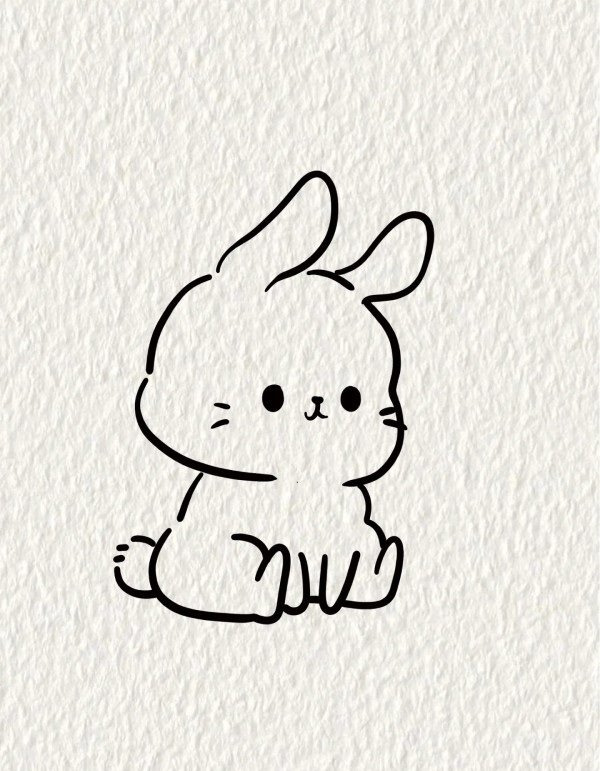
Step 4: Finish the face with two eyes, a cute nose, and blush marks. Add final touches to the body to complete your adorable Easter bunny drawing!
How to draw an easter bunny beautiful
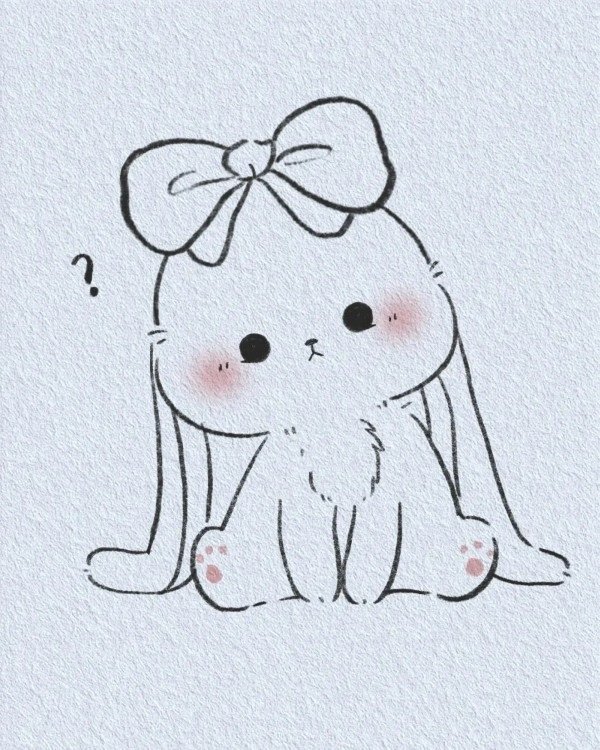
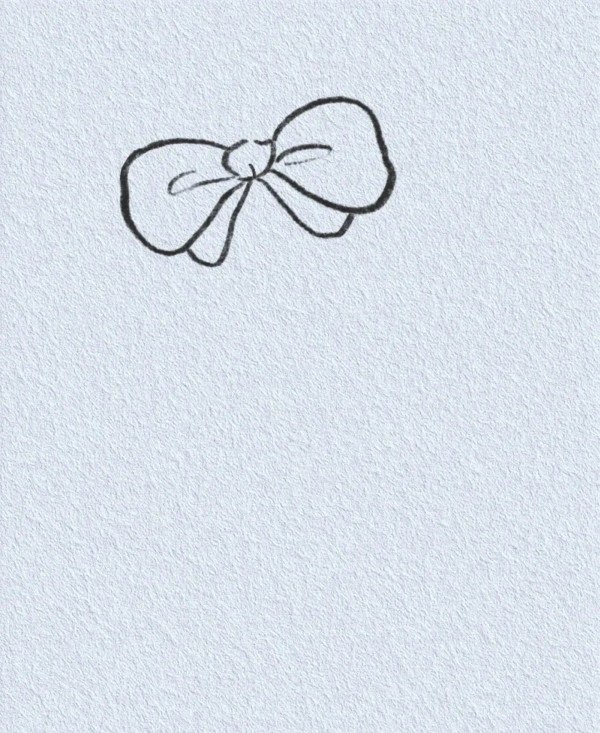
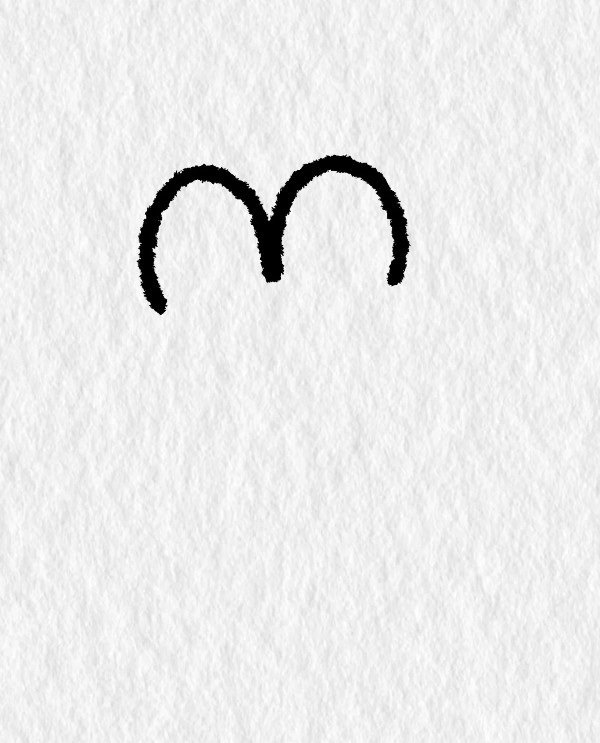
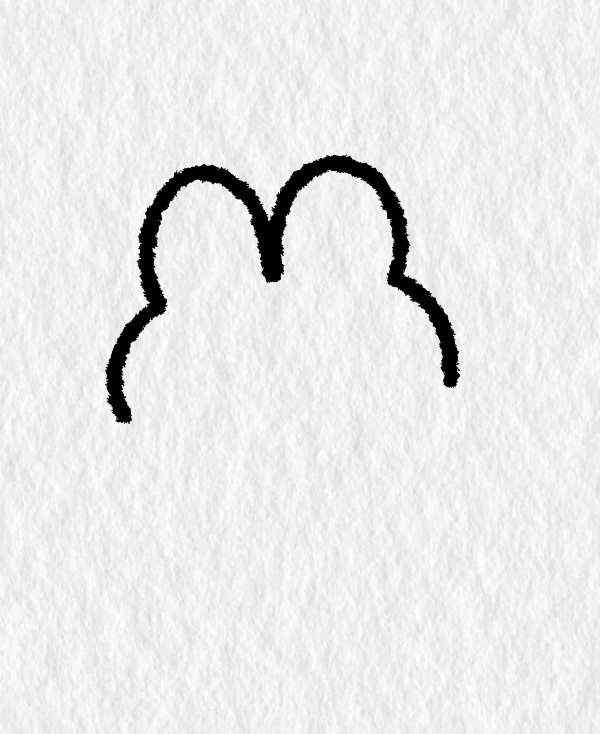
Step 1: Draw a large bow with two loops and flowing tails slightly tilted to the left—it will sit on top of the bunny’s head to add a cute and festive touch.
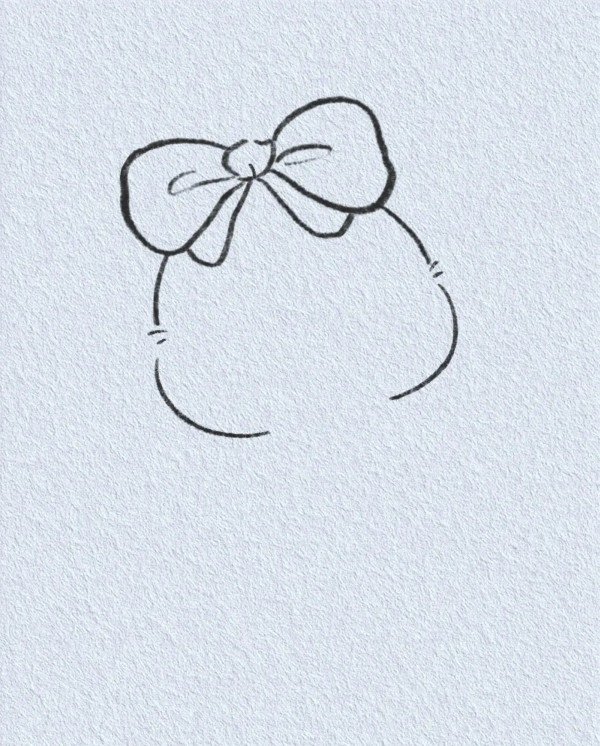
Step 2: Sketch the bunny’s head starting from the bow downward, then draw the rounded cheek and the front part of the chest in a soft, curved shape.
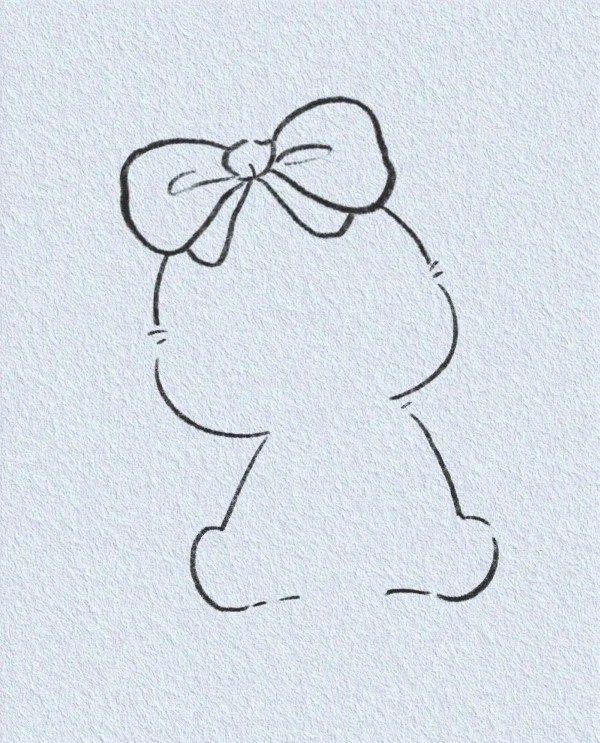
Step 3: Extend the body line down, adding the bunny’s back and bottom. Then draw the front paw visible beneath the bow, positioned gently.
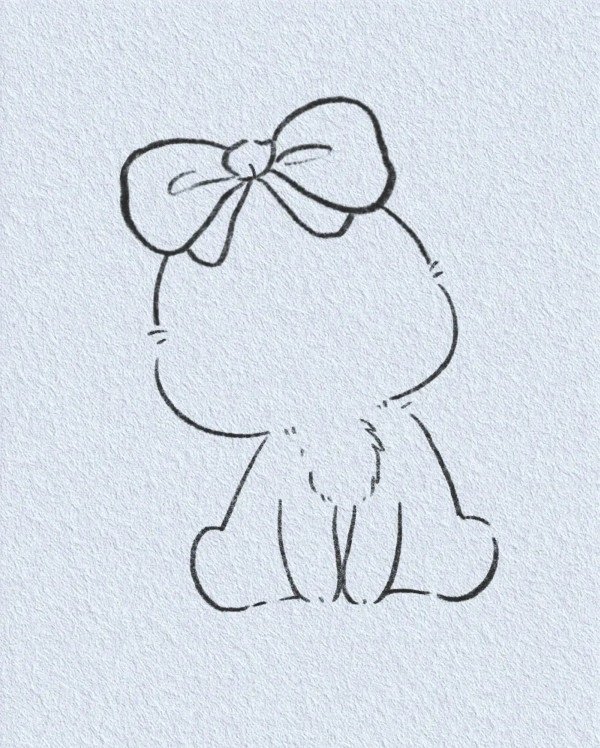
Step 4: Draw the second front paw and both large feet to show the bunny in a sitting pose. Make sure the paws are soft and rounded.
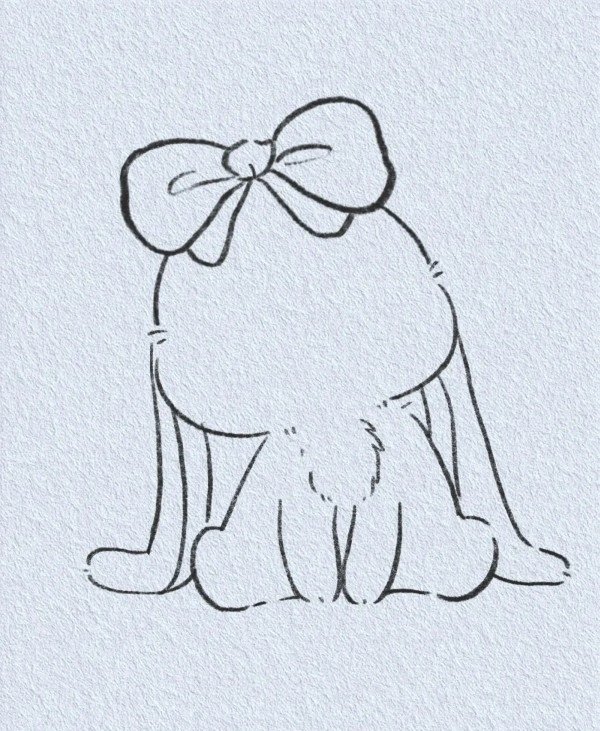
Step 5: Finish by adding the eye, nose, and whiskers. Add details to the fur and tail to complete your beautiful Easter bunny with a charming bow.
How to draw an easter bunny easy

Step 1: Start with two rounded shapes close together to form the bunny’s ears. Keep the lines simple and symmetrical for a cute and minimal look.
Step 2: Draw the fluffy head by adding a wavy line around the bottom of the ears, forming the outline of the bunny’s soft face.
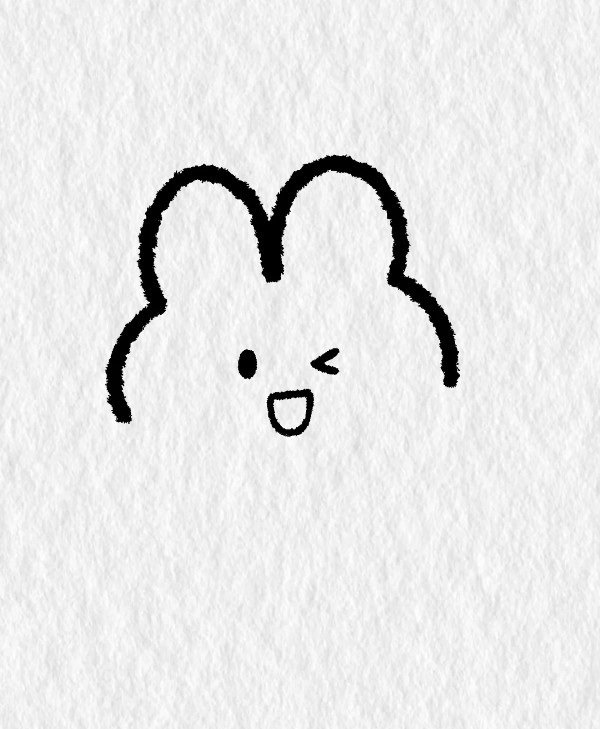
Step 3: Add two dot eyes, a small triangle nose, and a cute open mouth to bring the bunny’s face to life. Keep the expressions playful and friendly.
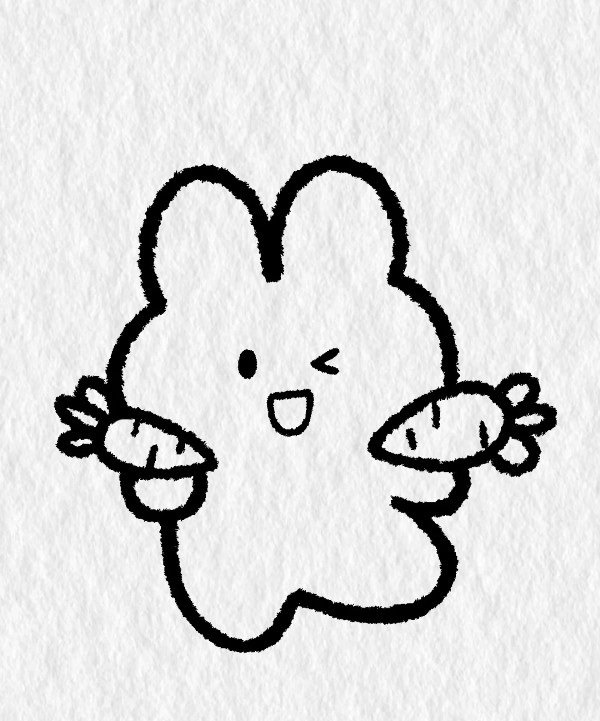
Step 4: Finish the drawing by sketching the round arms and legs, with tiny paws holding decorated Easter eggs or flowers for a cheerful holiday touch.
How to draw an easter bunny for kids
How to draw an easy easter bunny
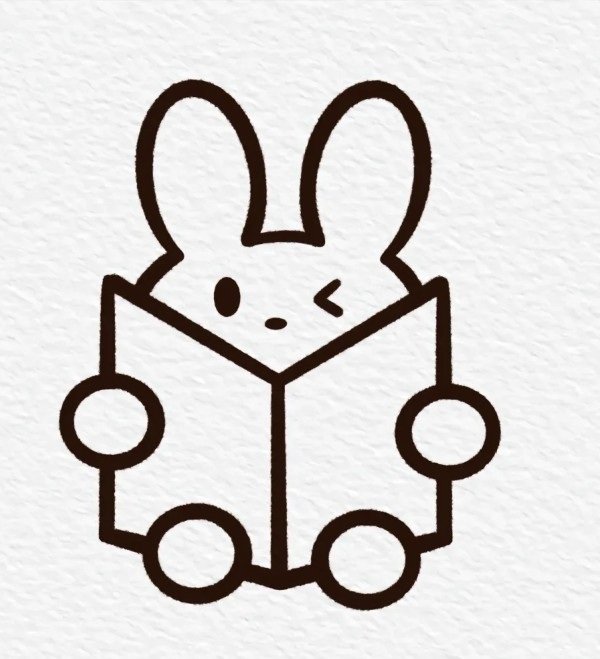
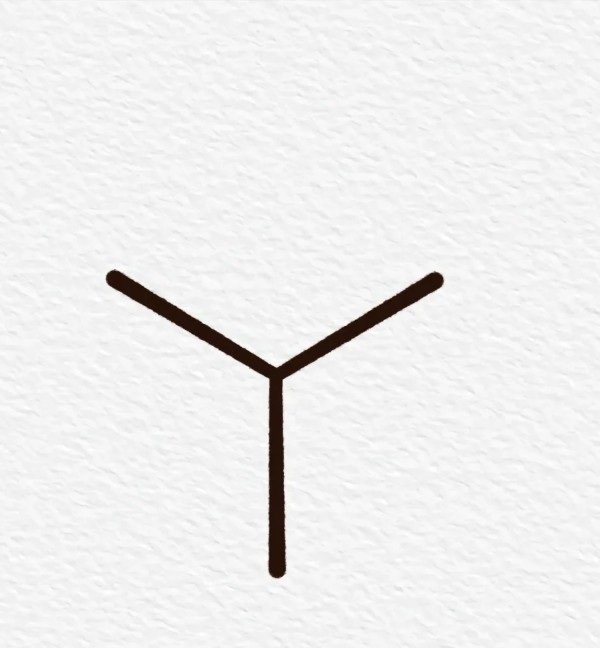
Step 1: Draw a wide upside-down “Y” shape to form the open book’s outline—this sets up the base for the bunny’s reading posture. 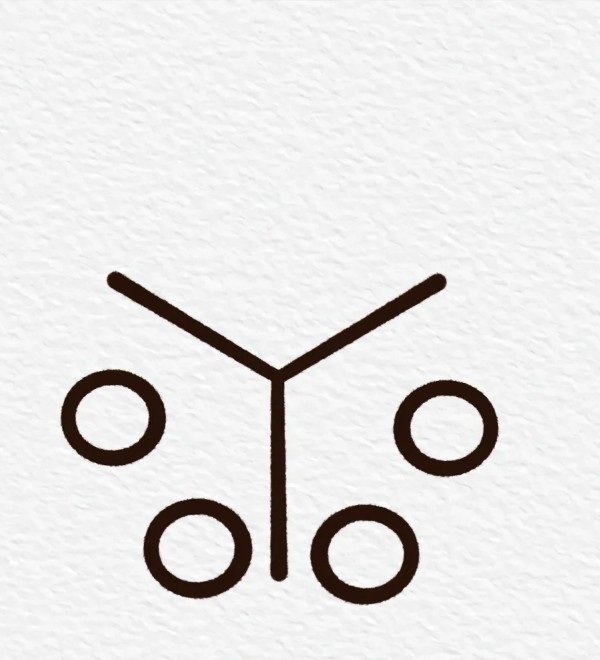
Step 2: Add two curved lines from each top corner to suggest the book’s edges, then draw four small circles below for the bunny’s hands and feet.
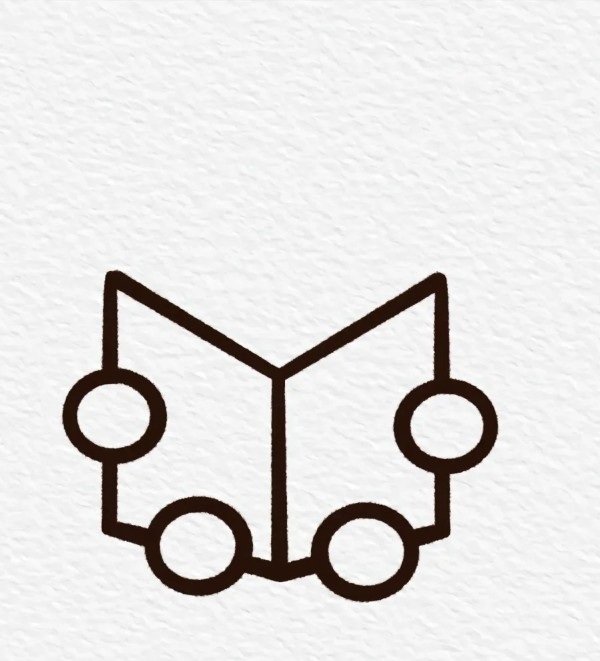
Step 3: Connect the circles and book outline to form the bunny’s body. The book now sits between its paws, showing it’s reading.
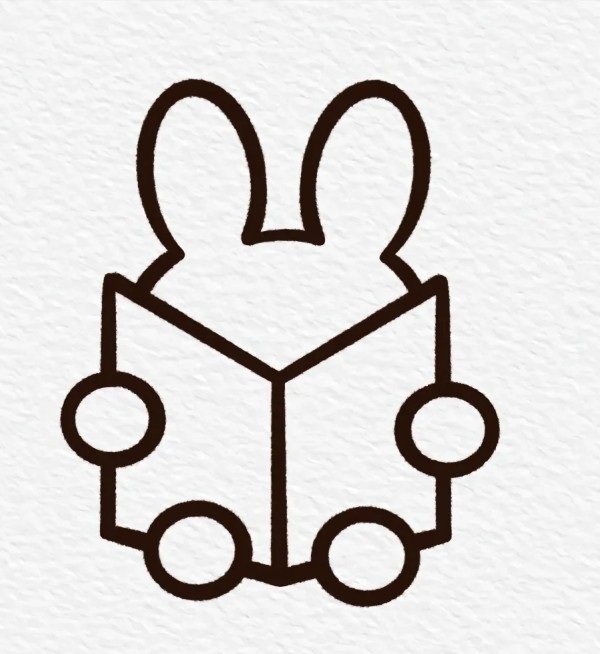
Step 4: Draw two long bunny ears on top of the book and add arms connected to the front paws to give the character life and emotion.
Step 5: Complete the drawing by adding the bunny’s eyes, nose, and mouth, then decorate the book’s cover with a small heart or Easter symbol.
See more:
5 Easy Steps on How to Draw a Witch Hat Like a Pro
Learn how to draw a Tulip in just 6 simple stages
10+ creative ideas to try for how to draw a Strawberry
Drawing an Easter bunny doesn’t have to be hard—it just takes a little guidance, a pencil, and some creativity. With practice, you can create your own unique bunny designs to share with friends or decorate your Easter cards. Keep exploring more fun tutorials on dooduko.com and level up your drawing game. Happy sketching and happy Easter!