If you’re looking for a peaceful yet fun drawing activity, learning how to draw a pine tree is a perfect pick. This nature-inspired subject is ideal for beginners and art lovers alike. From winter postcards to forest scenes, pine trees fit in everywhere. Don’t worry if you’ve never drawn one before—we’ve got you covered! With just a pencil and a bit of creativity, you can turn simple lines into beautiful art. Our easy tutorials are crafted for all skill levels, especially teens and young creators. Let’s explore the coolest ways to sketch this evergreen icon, step-by-step with dooduko.com.
How to draw a cartoon pine tree

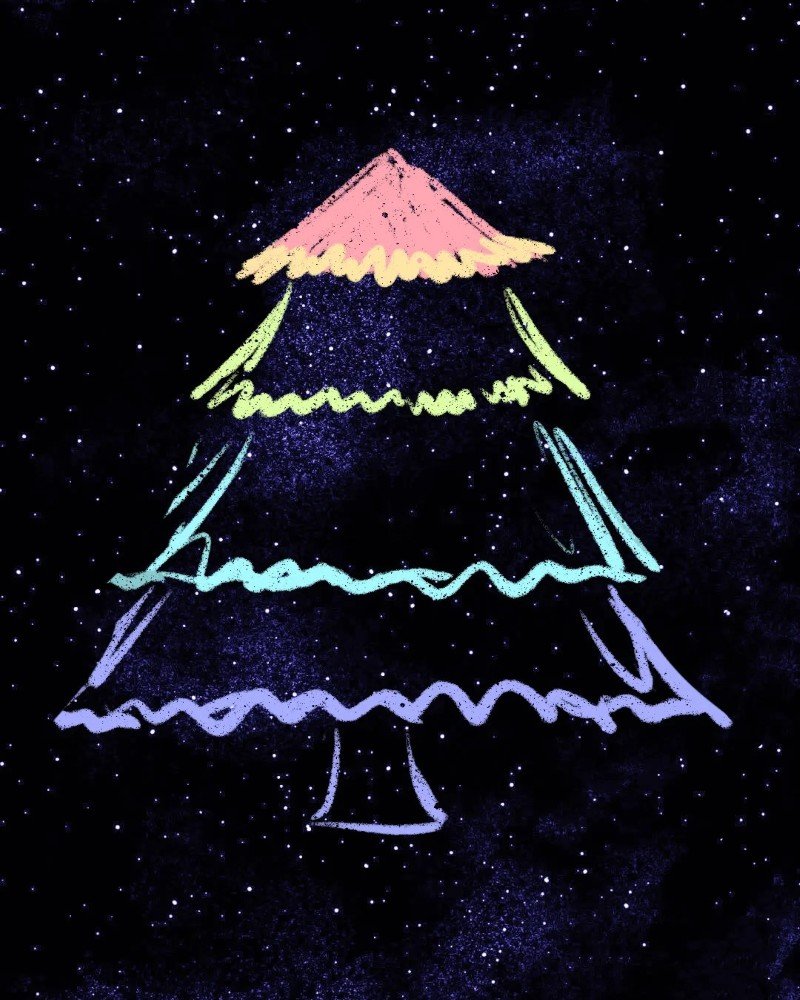
Step 1: Draw three stacked triangle shapes in rainbow layers with a short trunk at the bottom, forming the rough outline of your cartoon pine tree.
Step 2: Add curved edges to each layer, giving the tree a fuller and fluffier appearance like soft pine branches waving in the wind.
Step 3: Color each layer of the tree with a bright gradient rainbow, from pink at the top to green and blue at the bottom for a magical cartoon vibe.

Step 4: Fill in the tree trunk using a vibrant purple or dark pink shade to give it a cute, stylized contrast against the glowing tree colors.

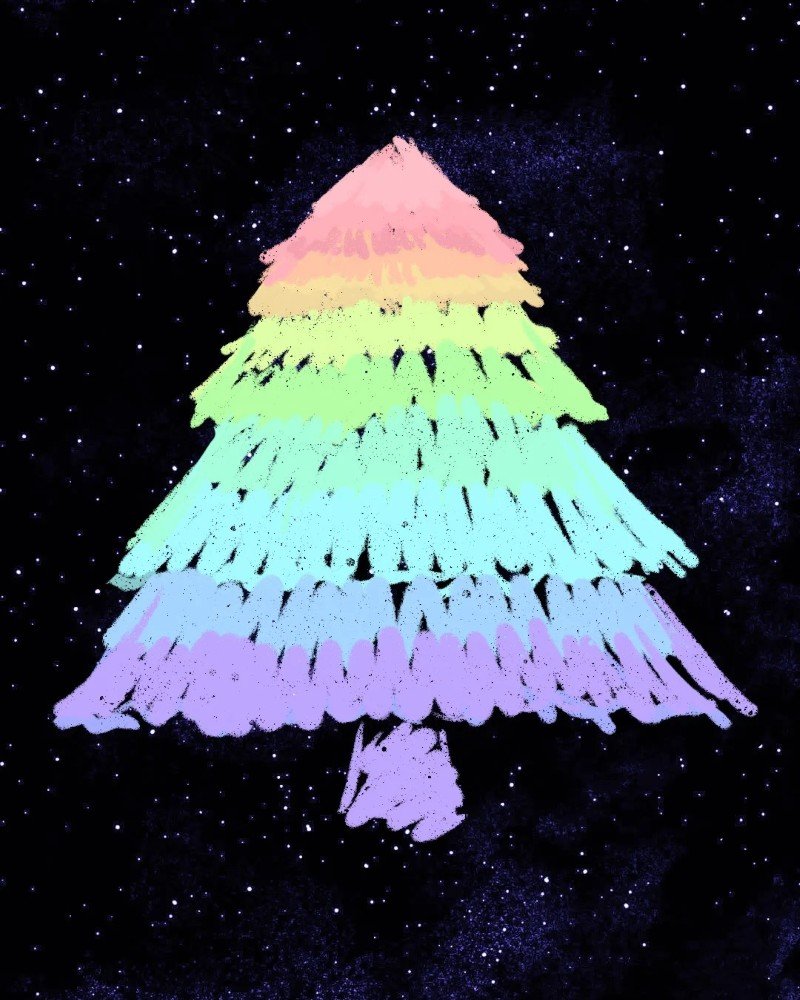
Step 5: Soften the gradient colors using light brush strokes, blending each section smoothly to enhance the cartoon pine tree’s dreamy glow.

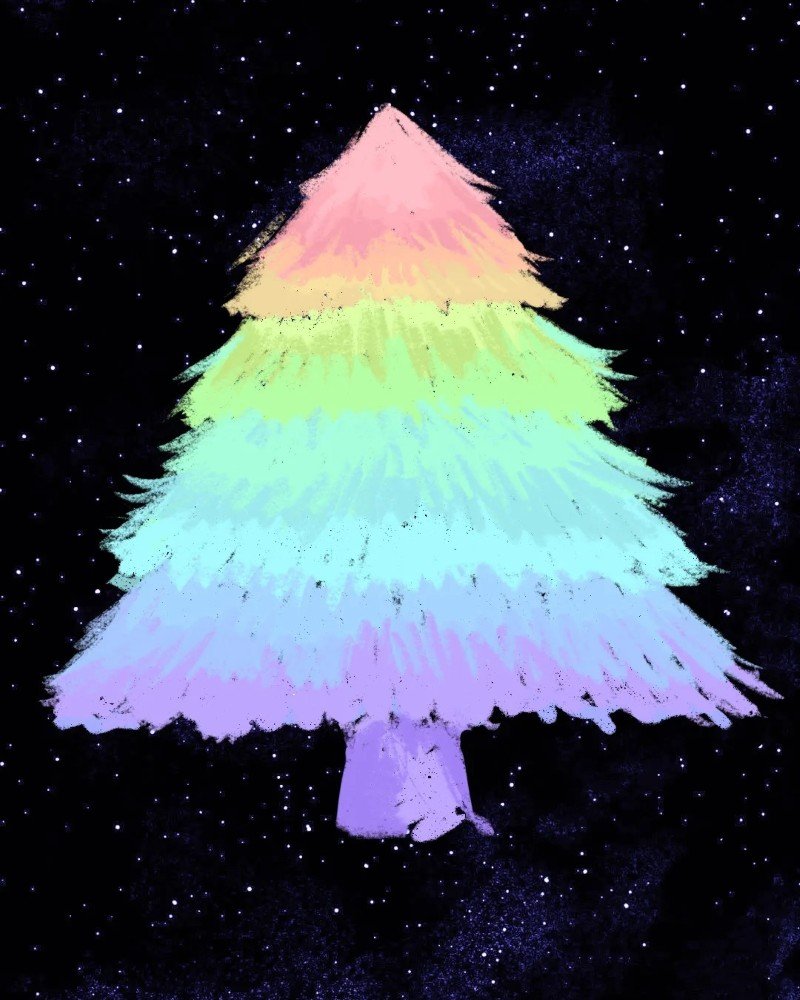
Step 6: Add subtle highlights and shadows to create dimension and make each pine layer pop out with soft lighting under a starry night background.

Step 7: Complete your cartoon pine tree by adding twinkling stars, sparkles, or snowflakes around it for a magical and festive final touch.
How to draw a pine tree


Step 1: Draw a swirly zigzag line that gets wider as it goes down, forming the outline of a cute pine tree with a freehand spiral look.

Step 2: Add a yellow star on top of the tree and draw a short brown trunk underneath to complete the basic pine tree structure.

Step 3: Wrap a pink ribbon loosely around the tree, following the spiral layers to create a fun and festive holiday decoration.

Step 4: Add cute ornaments like hearts, stars, and a gift box to the tree to finish your charming pine tree drawing in a cheerful style.
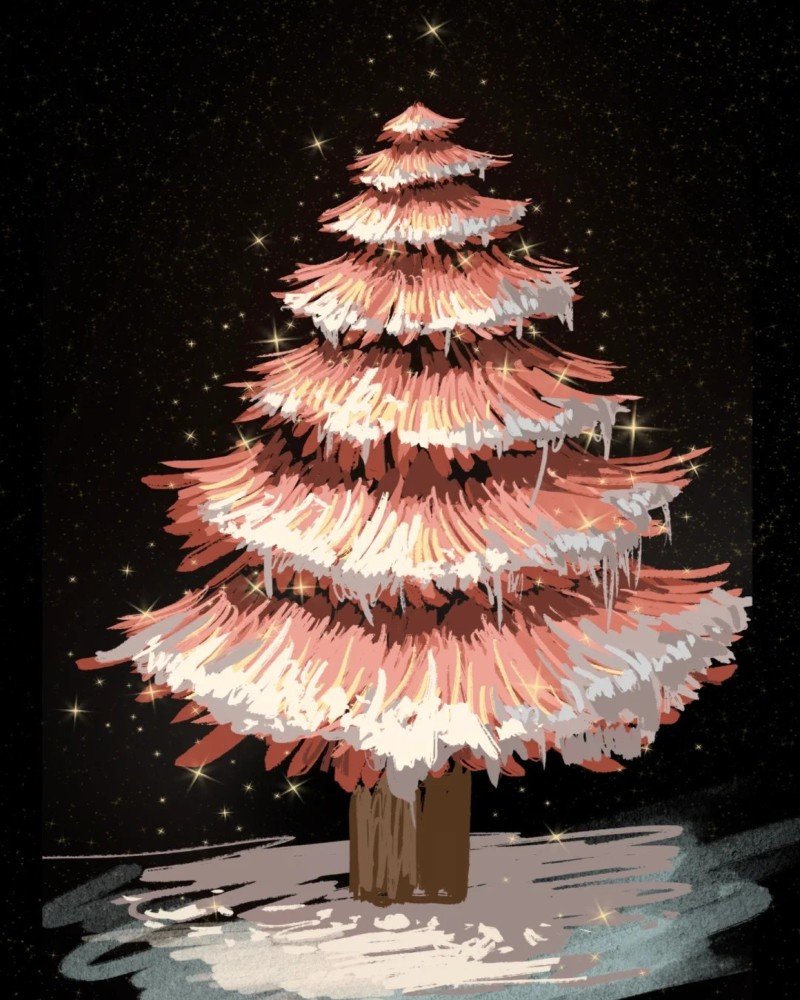
How to draw a pine tree easy


Step 1: Draw a triangle as the base structure of the pine tree using a light guide line to shape the body before adding any brushwork or colors.
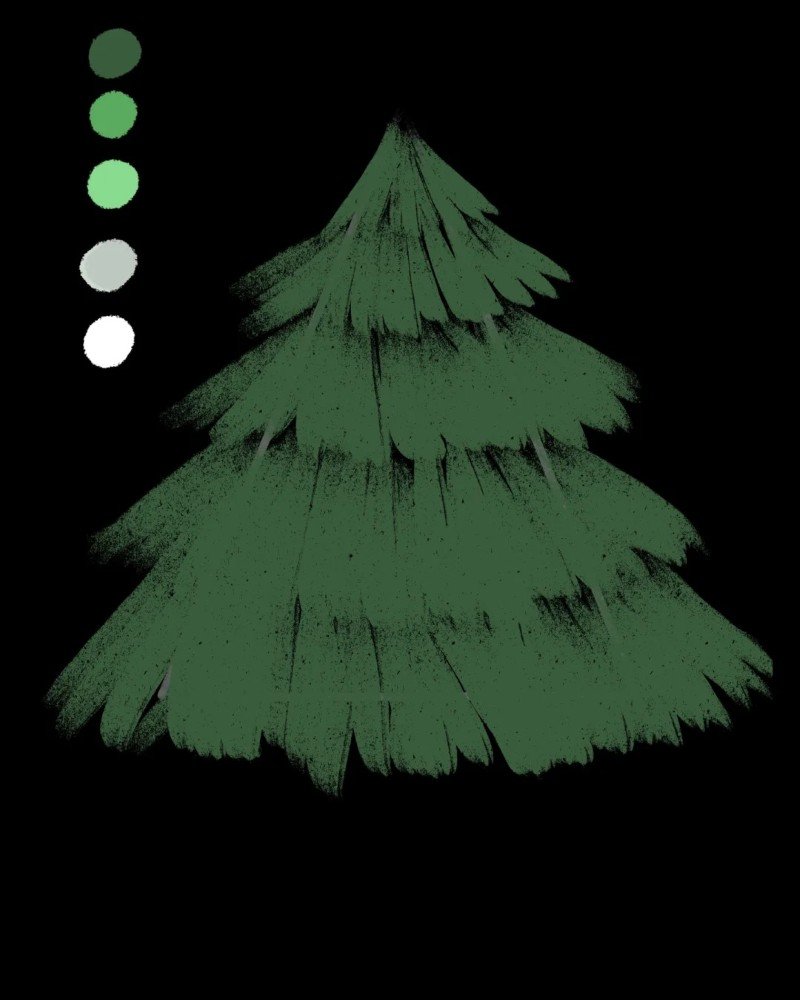
Step 2: Paint dark green layers starting from the top to bottom using curved strokes to mimic the look of overlapping pine tree branches.
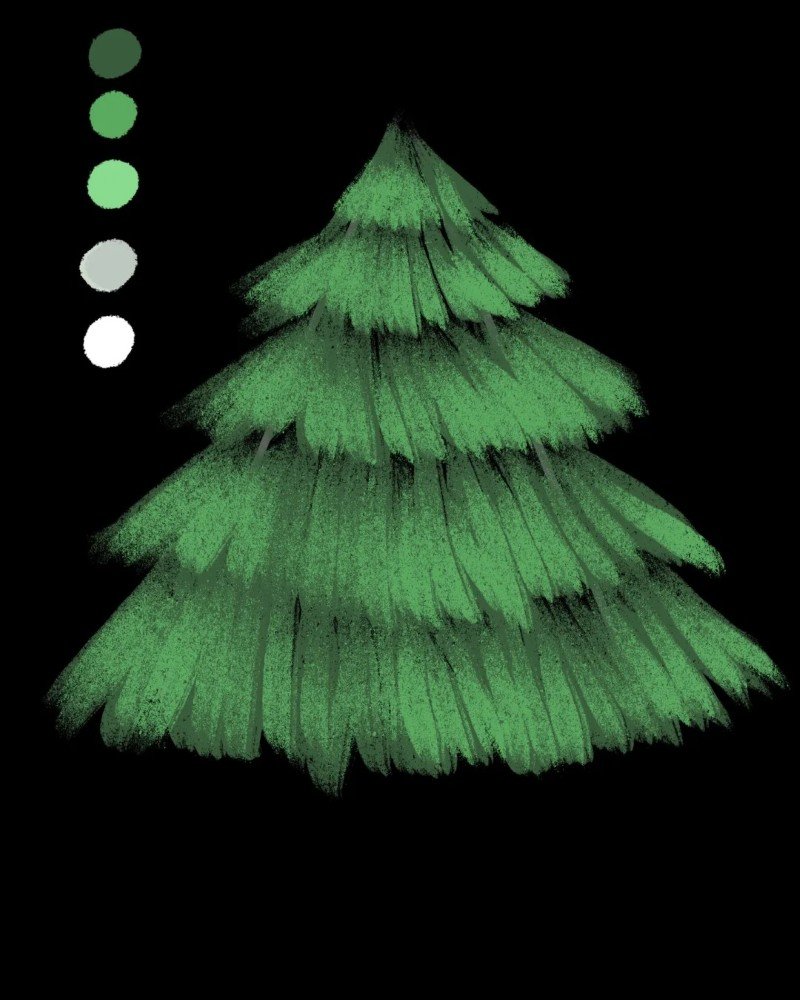
Step 3: Blend in lighter green tones toward the tips of each layer to give the pine tree more dimension and soft natural shading.
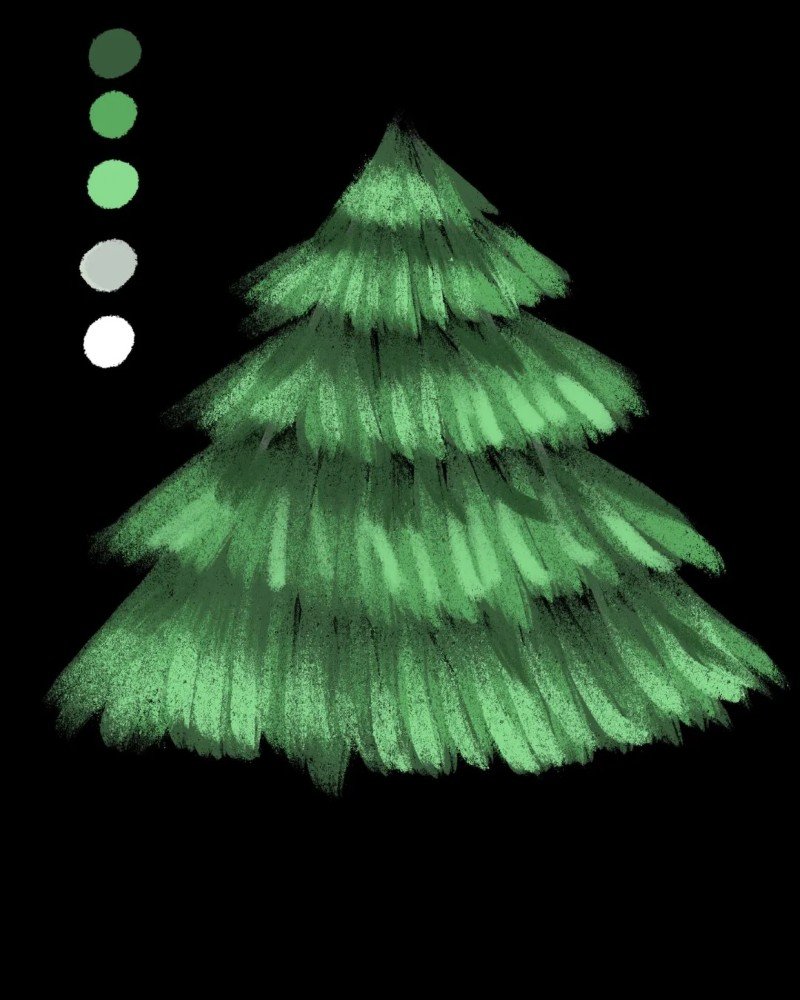
Step 4: Add bright highlights to the edges of each pine branch with light green and white to create depth and simulate soft lighting.
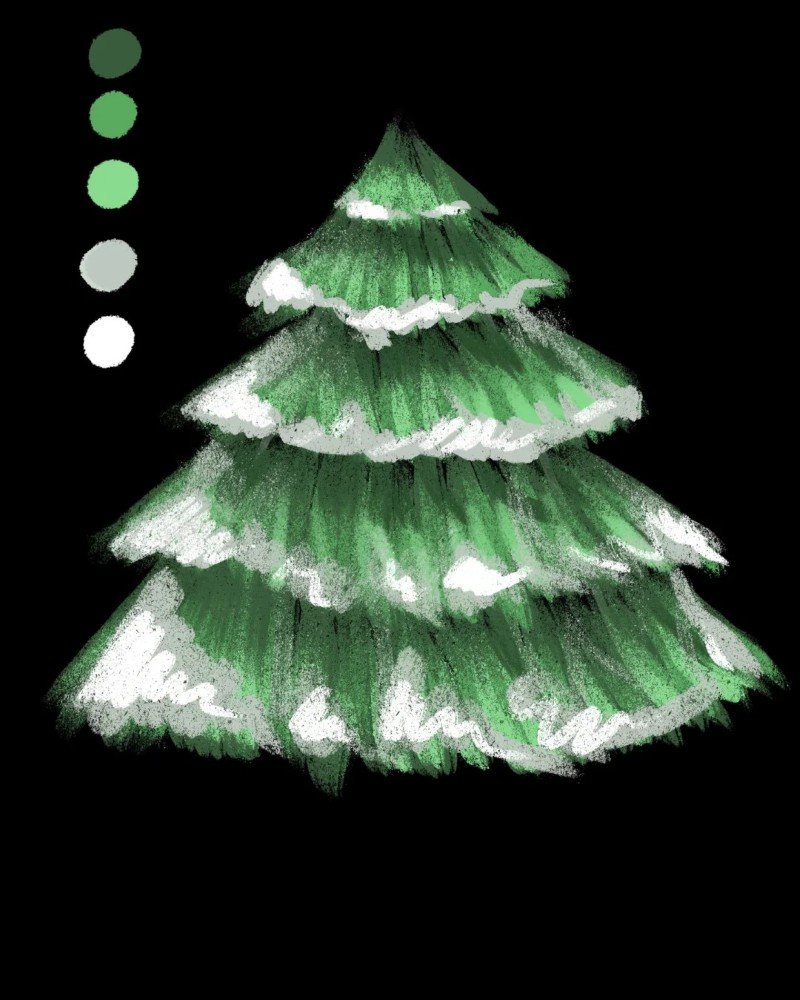
Step 5: Use white paint to softly brush on snow over the tree layers, making the pine tree look frosty and ready for a winter scene.

Step 6: Add more white snow and subtle shadows to enhance the contrast, making the snowy pine tree look more realistic and three-dimensional.
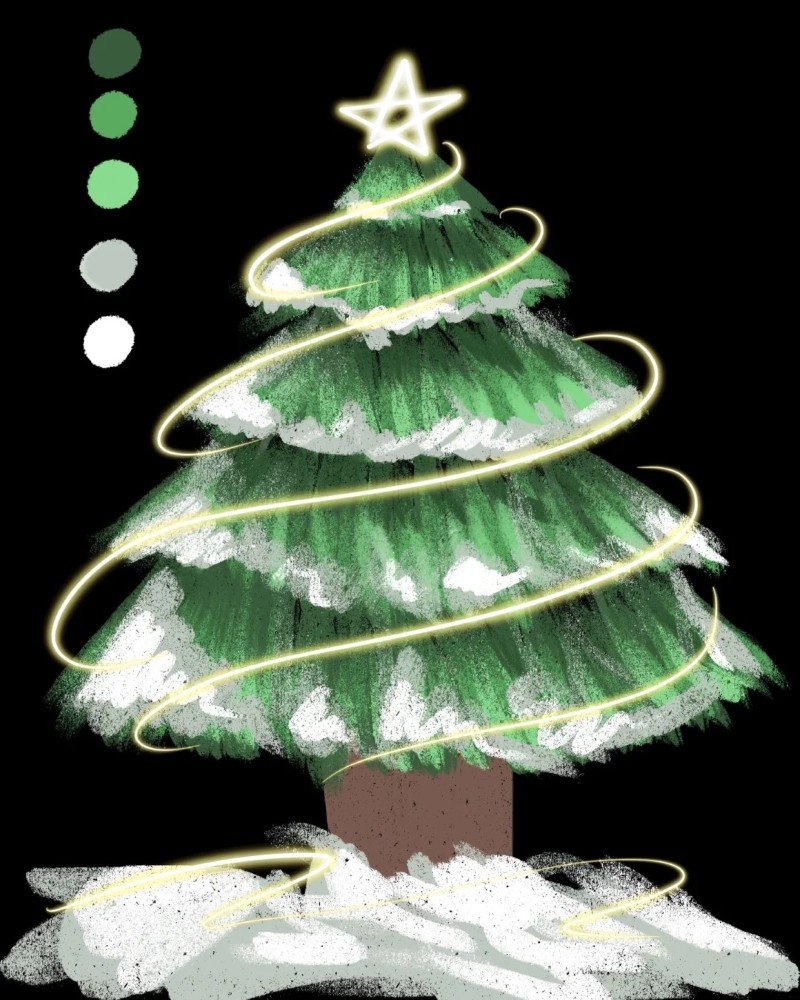
Step 7: Decorate the tree with golden lights, ribbons, and a star on top to finish your easy pine tree drawing in a festive holiday style.
How to draw a pine tree easy step by step

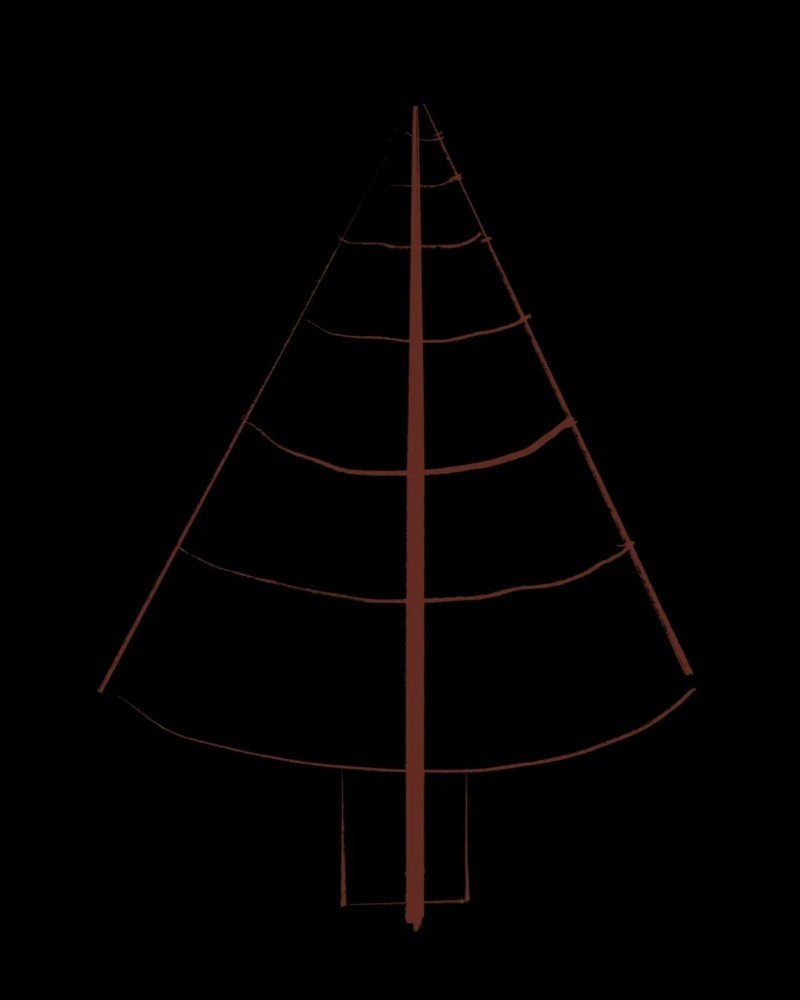
Step 1: Sketch a triangle with a curved vertical line and guides for each branch layer to set up the pine tree’s proportions and structure.
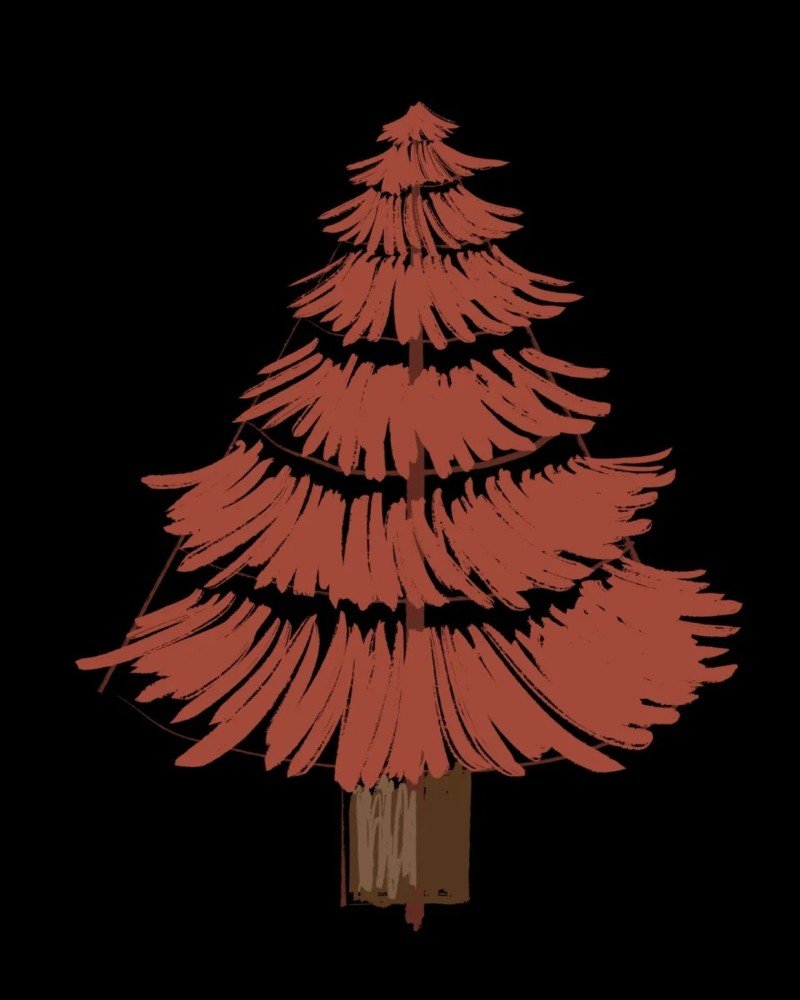
Step 2: Use a soft pink tone to loosely paint the first fluffy layer of pine needles at the bottom, forming the base of the tree.
Step 3: Add additional layers above the first using the same soft strokes, making sure each layer gets slightly smaller as you go up.
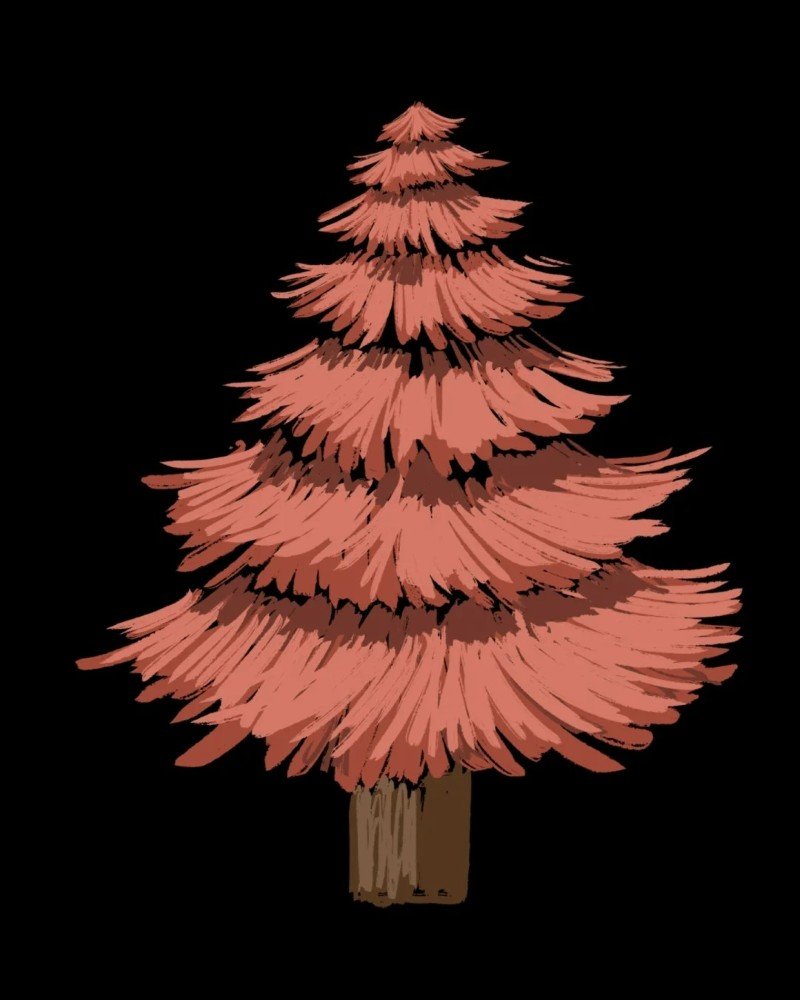
Step 4: Complete the full tree shape by adding the top layers, ensuring smooth flow and symmetry for that perfect pine silhouette.
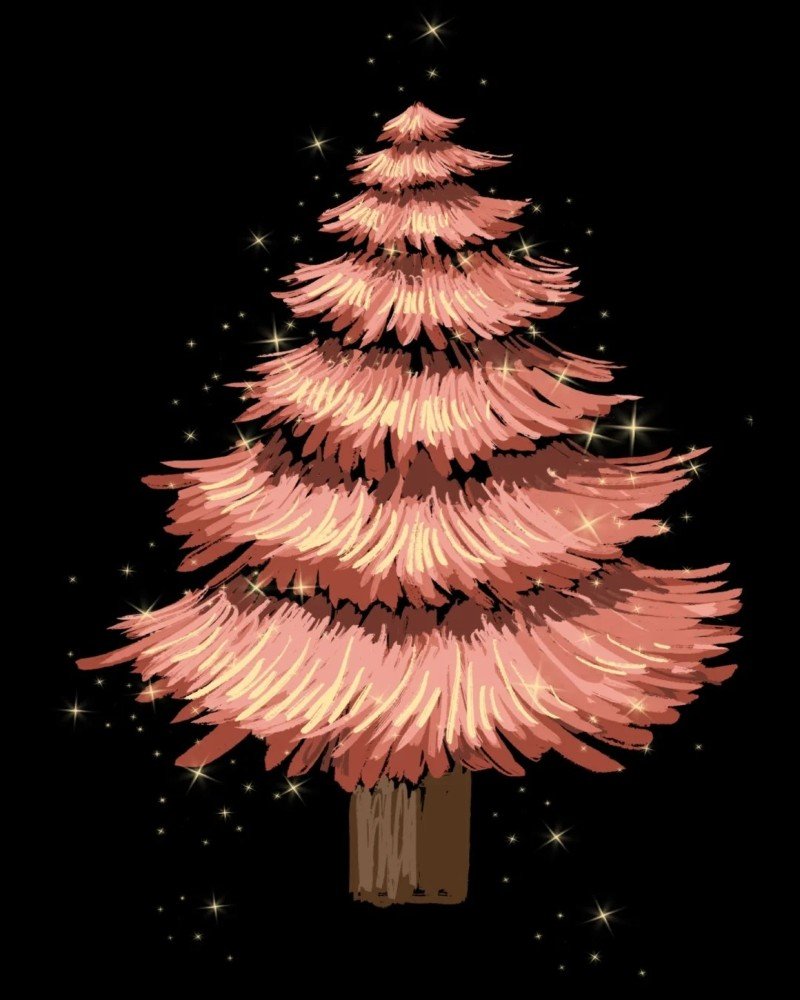
Step 5: Deepen the shadows with darker pink tones near the center and lower edges of each branch to add contrast and volume.
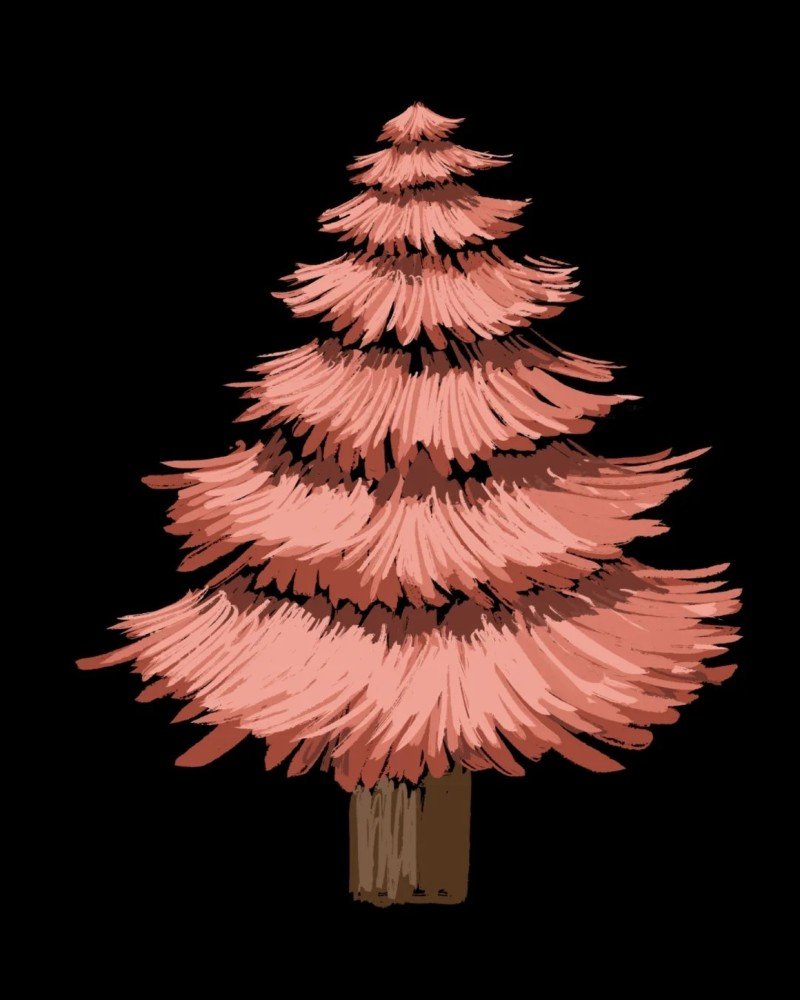
Step 6: Highlight the tips with light peach tones and add a soft white base for snow or glow effects to enhance realism.

Step 7: Finish with warm lighting, tiny ornaments, and a glowing star to transform your pink pine tree into a festive and magical masterpiece.
See more:
Top 8 tips on how to draw a microphone like a pro
5+ easy steps on how to draw a lotus flower for beginners
How to draw a knight in 6 detailed and fun steps
That’s a wrap on our pine tree sketching adventure! Whether you’re drawing for fun, school, or social content, your tree is now rooted in style. Remember, every great artist starts with simple lines—so keep practicing and don’t stress the mess. Want to explore more ideas on how to draw a pine tree in different styles? Stick with us! Your skills will grow just like your favorite pine tree. Keep coming back for fresh takes on how to draw a pine tree and level up your drawing game every season!