Learning how to draw a sofa can be a fun and rewarding challenge for anyone who loves interior design or furniture sketches. Whether you’re a beginner or already have some drawing experience, starting with a sofa helps build your ability to draw shapes, curves, and proportions. A sofa’s clean lines and soft cushions offer a perfect blend of structure and comfort, making it a great object to practice your creativity. In this guide, we’ll walk you through step-by-step techniques to sketch different sofa styles. From modern minimalism to vintage elegance, we’ve got you covered.
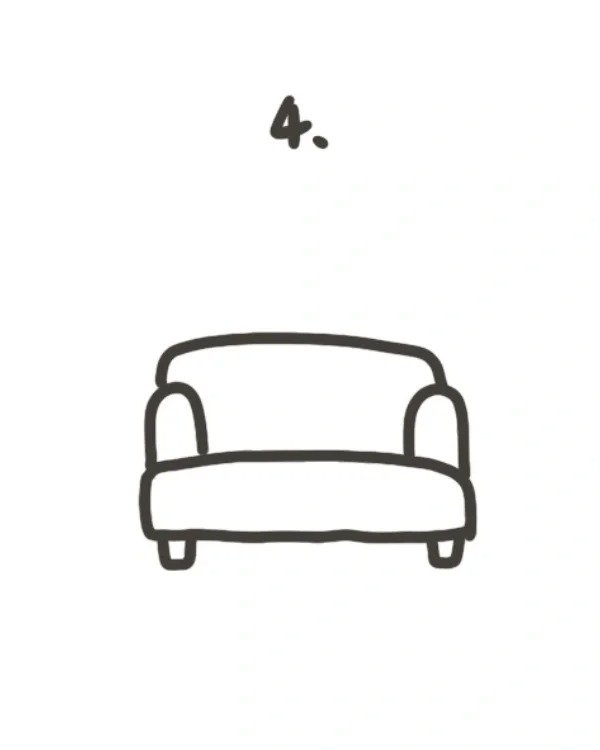
How to draw a easy sofa
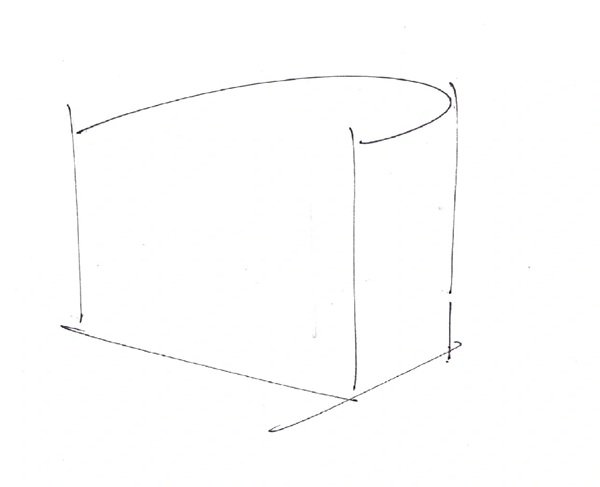
Step 1: Draw a vertical rectangle with a curved top corner to form the armrest and basic side structure of the sofa. Keep the lines light and clean.
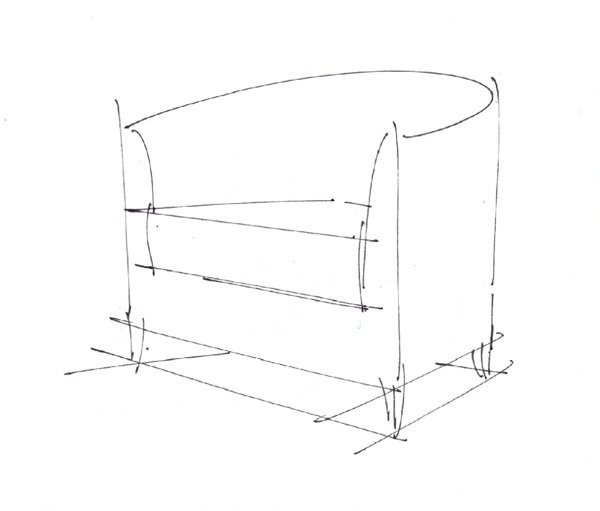
Step 2: Add the front and seat planes by drawing horizontal and vertical guidelines to define the sofa’s depth and base proportions.
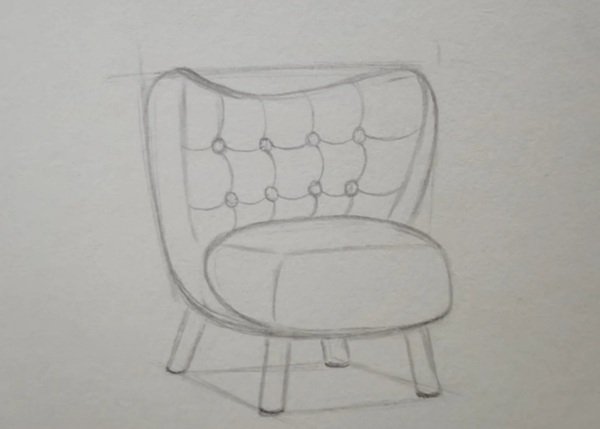
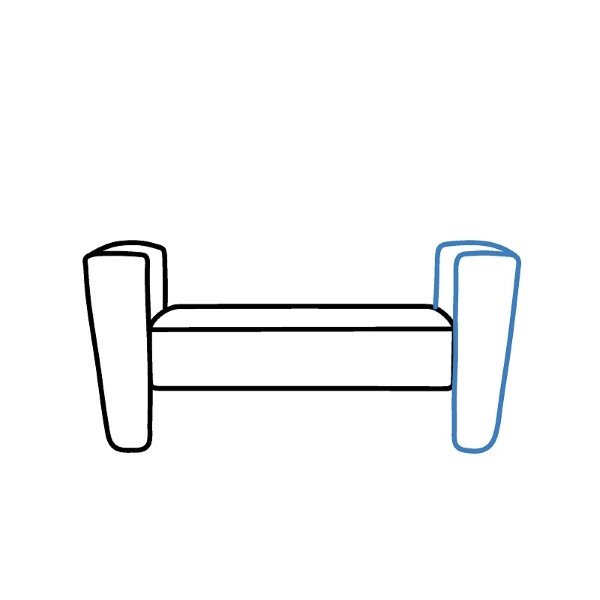
Step 3: Sketch the backrest and connect it to the side armrest. Add inner lines to show the inner cushion placement and sofa’s 3D form.
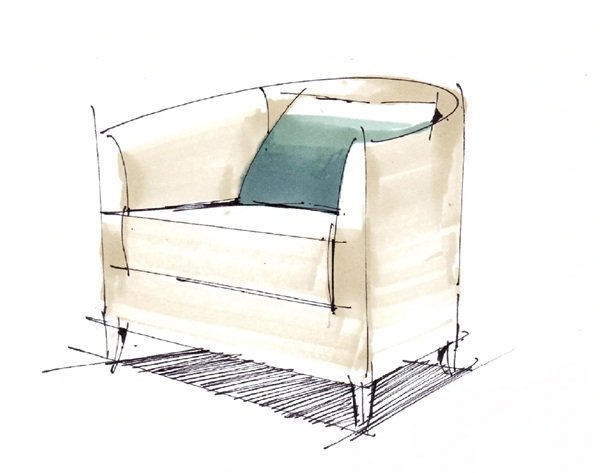
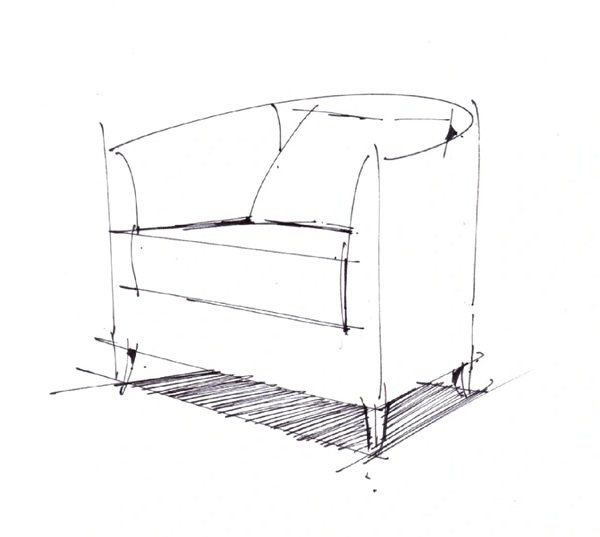
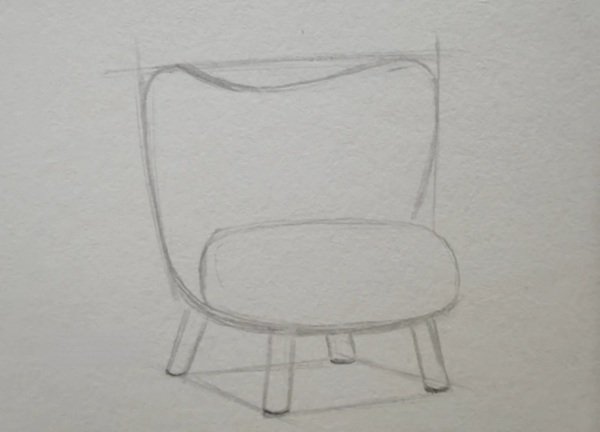
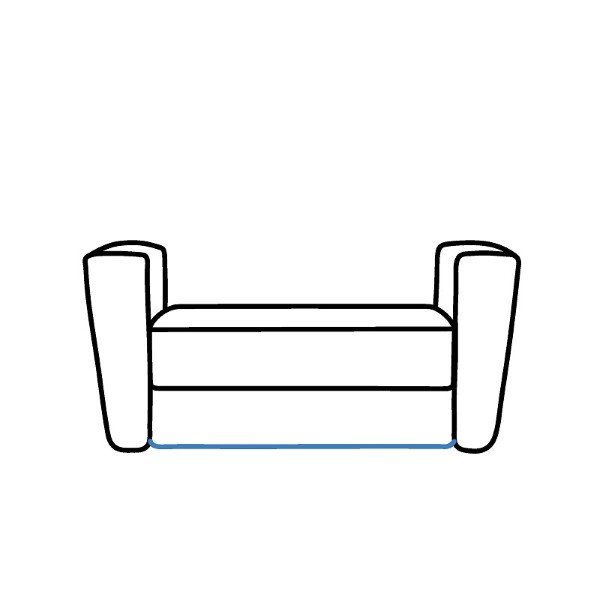
Step 4: Refine the sofa lines, smooth out edges, and draw the visible seat cushions and side seams. Add a round pillow for comfort detail.
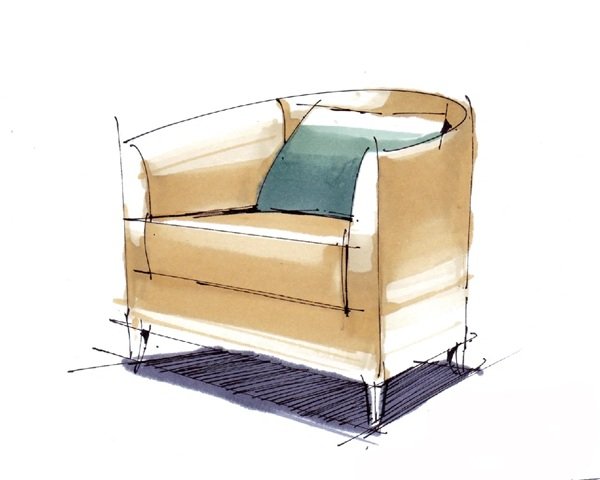
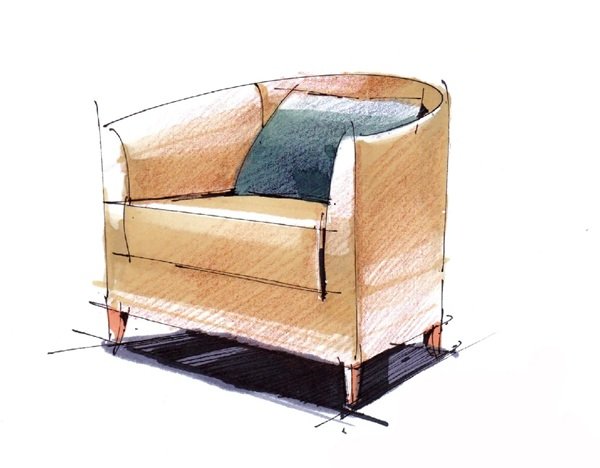
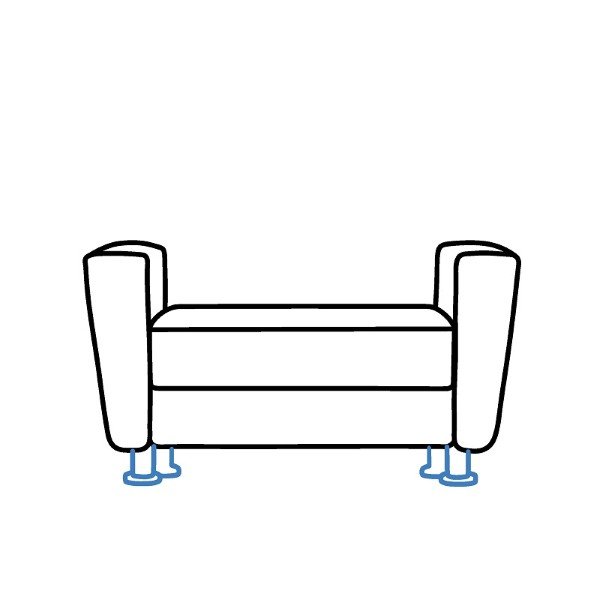
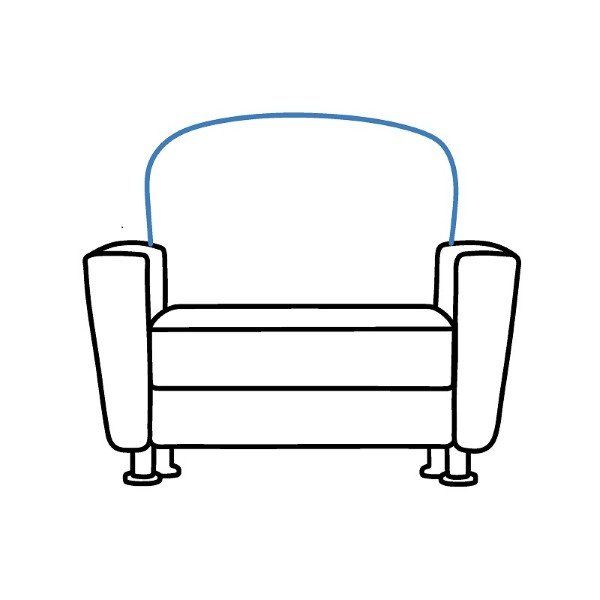
Step 5: Finalize the sofa by coloring with beige tones and adding shadows. Use blue for the pillow and enhance light to give a realistic 3D effect.
How to draw a sofa


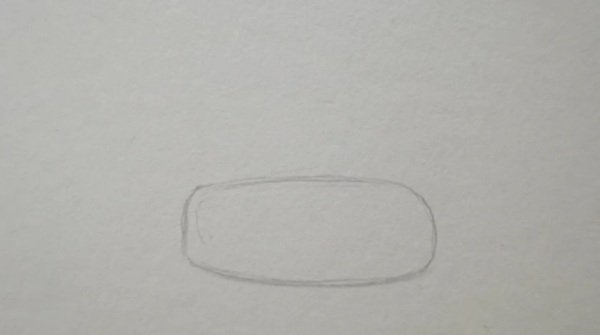
Step 1: Draw a small horizontal oval to create the base cushion of the sofa, keeping it slightly thick and flat for a comfy cartoon look.
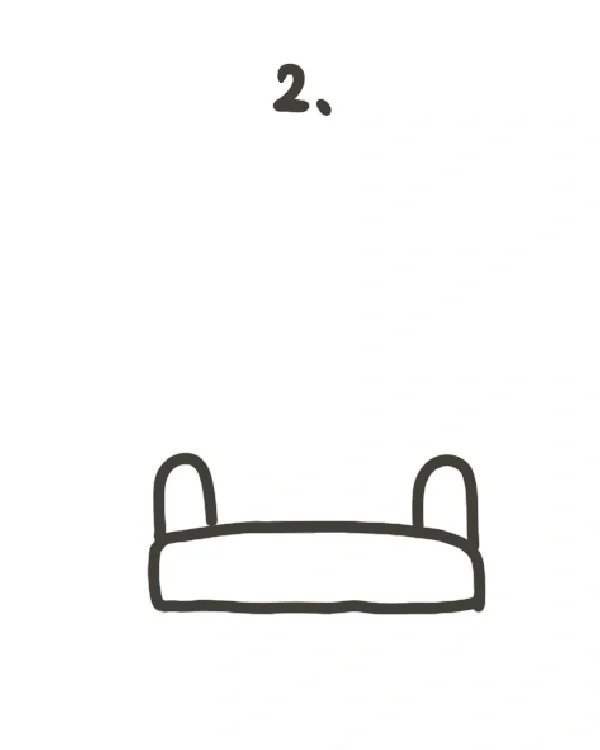
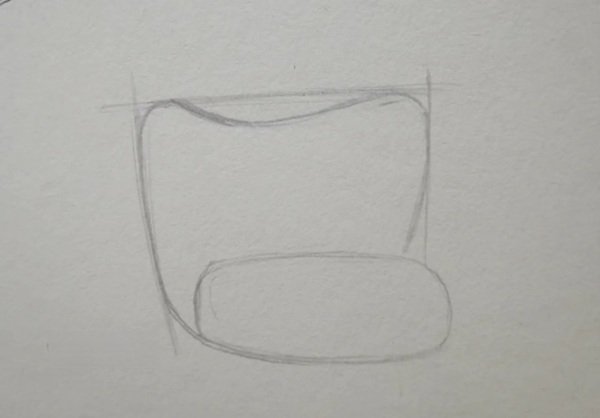
Step 2: Add two vertical curved lines on each side to form the armrests, making sure they align with the edges of the base cushion evenly.
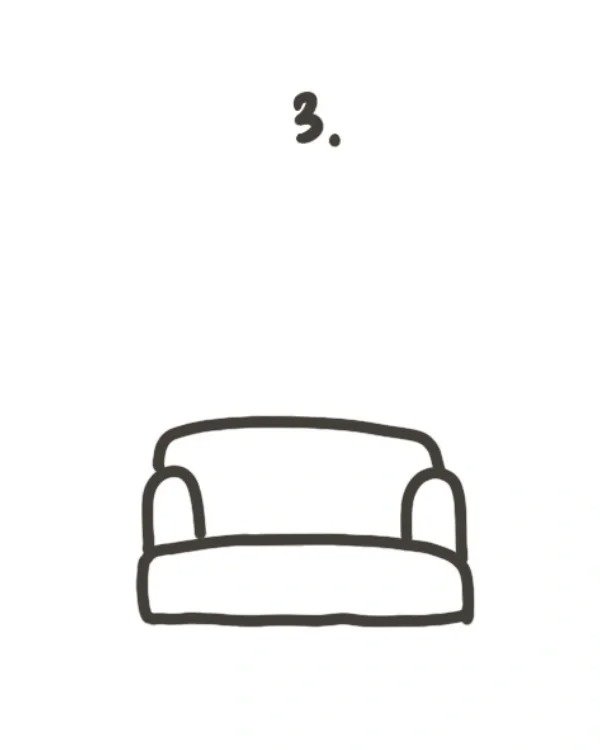
Step 3: Draw a large curved line connecting the armrests to shape the sofa’s backrest, making it smooth and slightly arched for a cute feel.
Step 4: Add small rounded feet underneath the sofa to complete its base, making sure each leg is evenly spaced and proportionate.

Step 5: Decorate your sofa by drawing a cushion and a small blanket on one side, adding personality and making it more fun and cozy!
How to draw a sofa easy
How to draw a sofa for kids

Step 1: Begin by drawing a narrow horizontal rectangle to create the sofa’s seat base, keeping the corners rounded for a friendly, kid-friendly look.
Step 2: Extend the backrest upward using a taller rectangle behind the seat, and add depth by sketching the side edge of the seat base.
Step 3: Draw two vertical armrests on both sides with curved inner edges to give the sofa a cozy and cartoonish appearance.
Step 4: Connect the bottom of the armrests with the seat to complete the sofa’s structure, then refine all outlines to make it symmetrical.
Step 5: Add short rounded feet beneath each corner of the sofa, placing them evenly for balance and to support the cartoon sofa’s shape.
Step 6: Draw a large curved line above to form the sofa’s upper backrest, making it look soft, padded, and perfect for a kid’s room style!
How to draw a sofa step by step

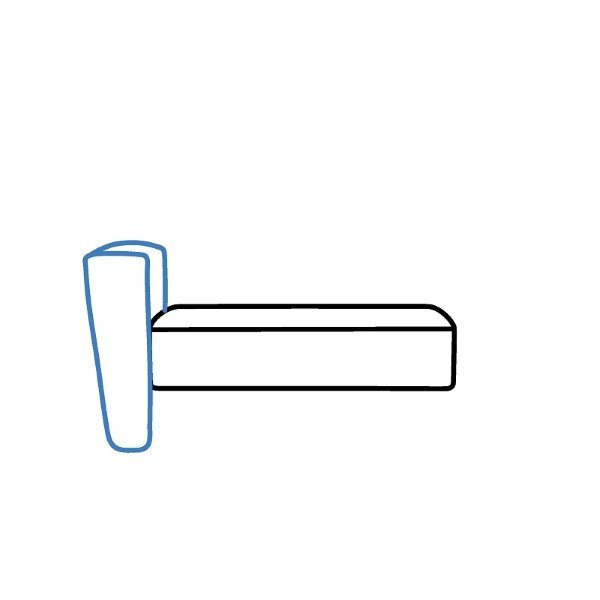
Step 1: Start by drawing a vertical rectangle on the left side to represent the front-facing panel of the sofa arm. Align it with the grid for accuracy.

Step 2: Extend a horizontal line from the rectangle’s top and side to create a 3D box, forming the base structure of one sofa armrest.
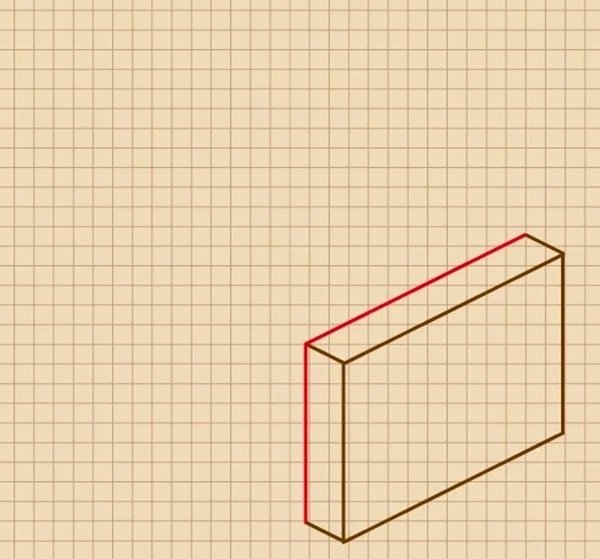
Step 3: Add thickness by closing the box with a vertical back edge, completing the 3D side structure. Keep proportions steady with previous lines.
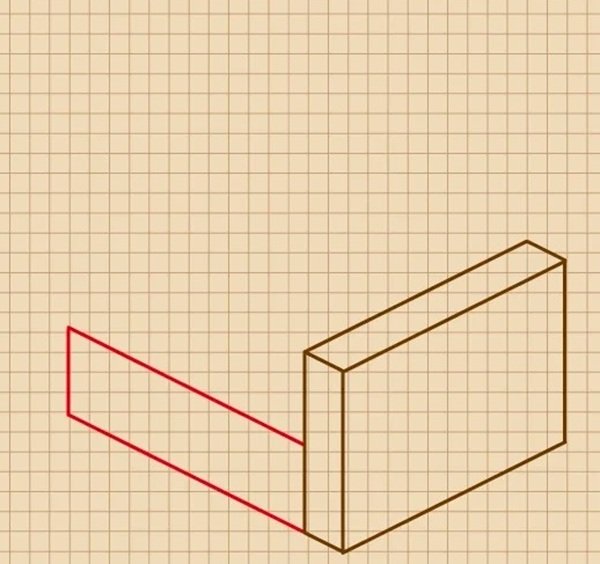
Step 4: Sketch a horizontal panel extending rightward to form the front part of the seat. Connect it to the base using a vertical line.
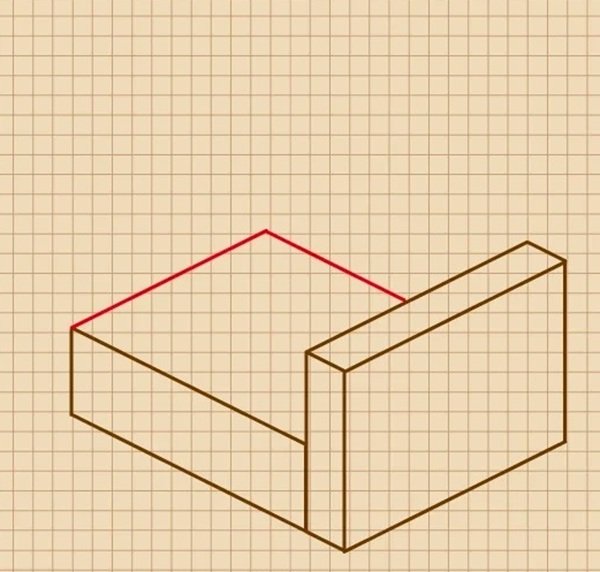
Step 5: Complete the seating area by adding a horizontal surface above, giving it a cushion-like appearance and matching the depth of the armrest.
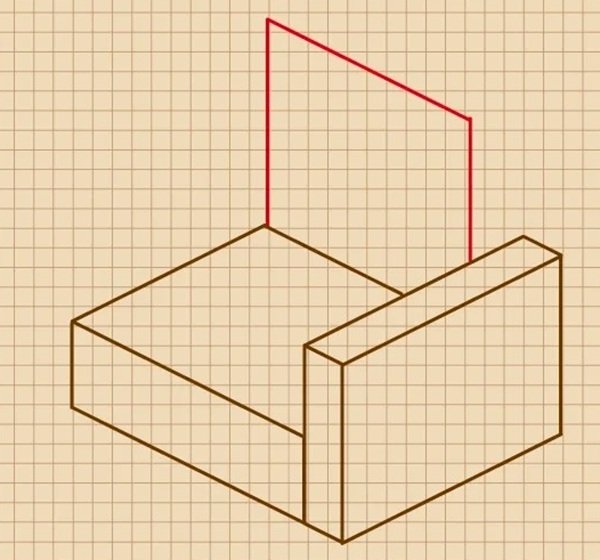
Step 6: Draw a vertical panel behind the seat to start forming the backrest. This should align perfectly with the side and seat to look balanced.
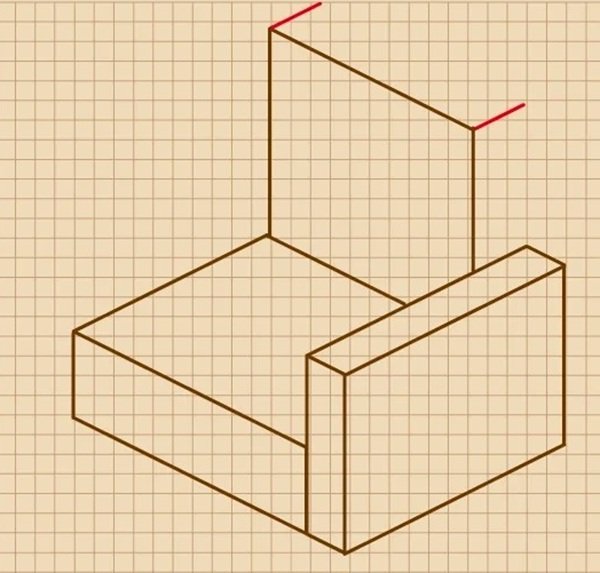
Step 7: Add volume to the backrest by turning it into a 3D block that extends upward and backward, keeping all edges parallel for depth accuracy.

Step 8: Add a thick right armrest with matching height and proportions to the left one. Ensure perspective remains consistent across all parts.
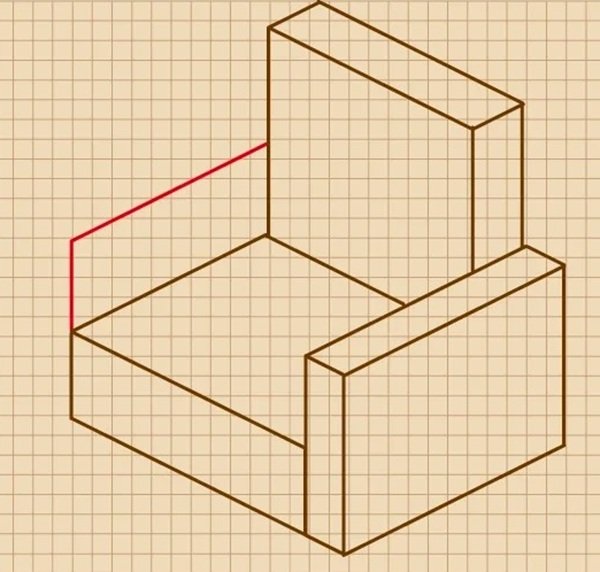
Step 9: Include small inner panels to give detail and depth inside the seat and arm areas. Use thin lines to show inner cushions or shadow edges.
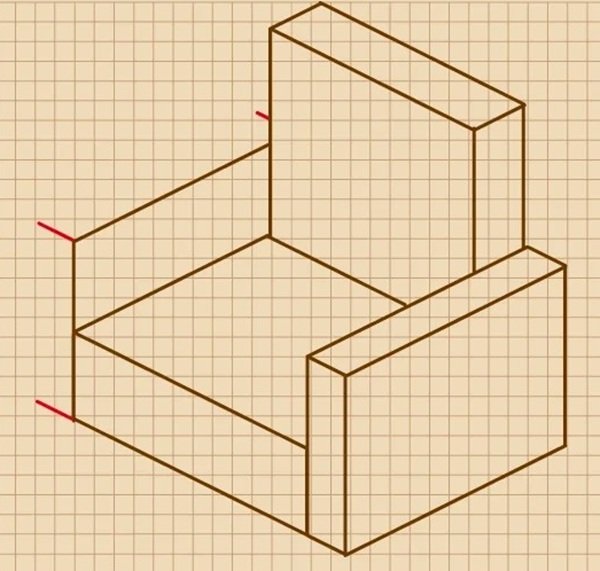
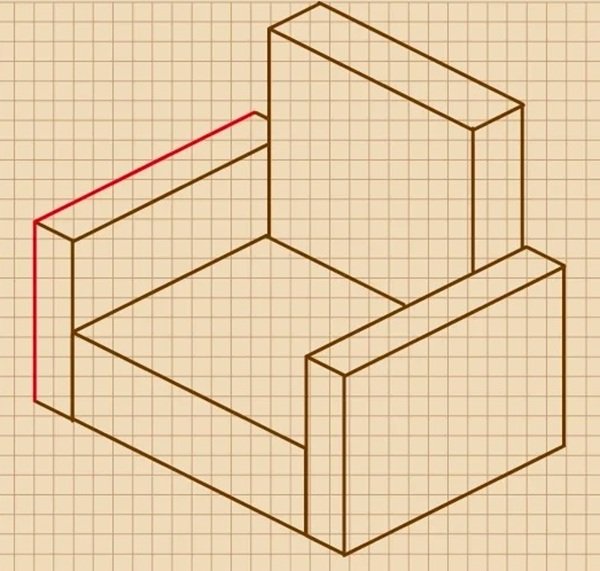
Step 10: Finalize the structure with clean outlines and define the full sofa shape with perspective, ready to be detailed or colored as desired.
See more:
Top 8 pro tips on how to draw a shrimp with style
5 easy steps on how to draw a rooster for beginners
6 creative ways to learn how to draw a police car
Now that you’ve mastered the steps on how to draw a sofa, it’s time to explore different styles, play with shading, and make your design truly unique. Don’t be afraid to experiment—maybe add some pillows, a cozy throw, or even a sleeping cat for a creative touch. Drawing is all about expressing your ideas and improving with practice. Keep sketching and let your imagination shape your sofa designs in new, exciting ways. Come back anytime you need more inspiration or fresh ideas to add to your creative journey.