Are you a young artist or doodler who’s always wanted to sketch a cute little ladybird? You’re in the right place! In this guide, we’ll break down how to draw lady bird in a fun, easy-to-follow way that anyone can enjoy — even if you’re just starting out. Whether you’re using paper and pencil or your favorite drawing app, these steps will help you capture the charm of this tiny insect.
You’ll also discover creative poses, fun tips, and simple tricks that make your ladybird art pop. Each example on dooduko is designed to spark creativity and confidence. Let’s get sketching and make your ladybird come to life with style!
How to draw easy lady bird


Step 1: Draw a large capital letter D shape on its side – this will be the main body of your ladybird and gives it that classic rounded shape.
Step 2: Add a straight line down the middle for the wings, draw two small circles for the eyes, and sketch a curved line for the head top.
Step 3: Draw two circles for the eyes, fill them in, then outline the wing lines more clearly – now your ladybird has a cute face and body!

Step 4: Add small circles on the wings to create the ladybird’s signature spots and enhance the overall body details with bold outlines.
Step 5: Draw six legs, two small antennae, and touch up your lines to complete your charming ladybird with a fun and friendly expression.
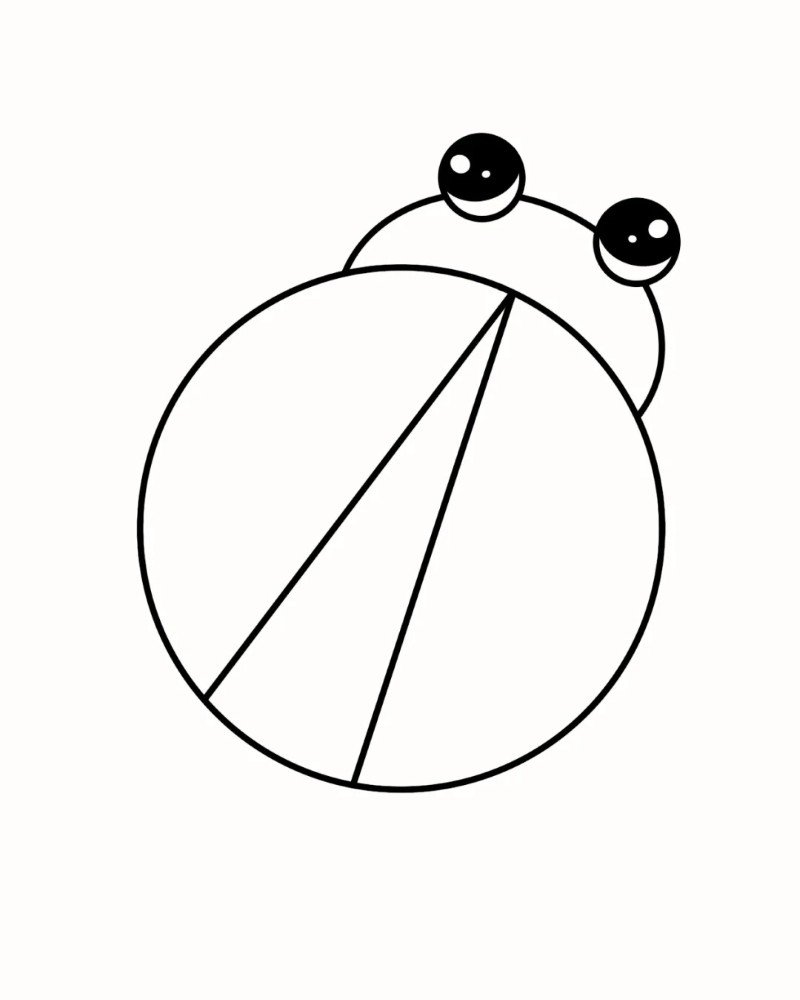
How to draw lady bird

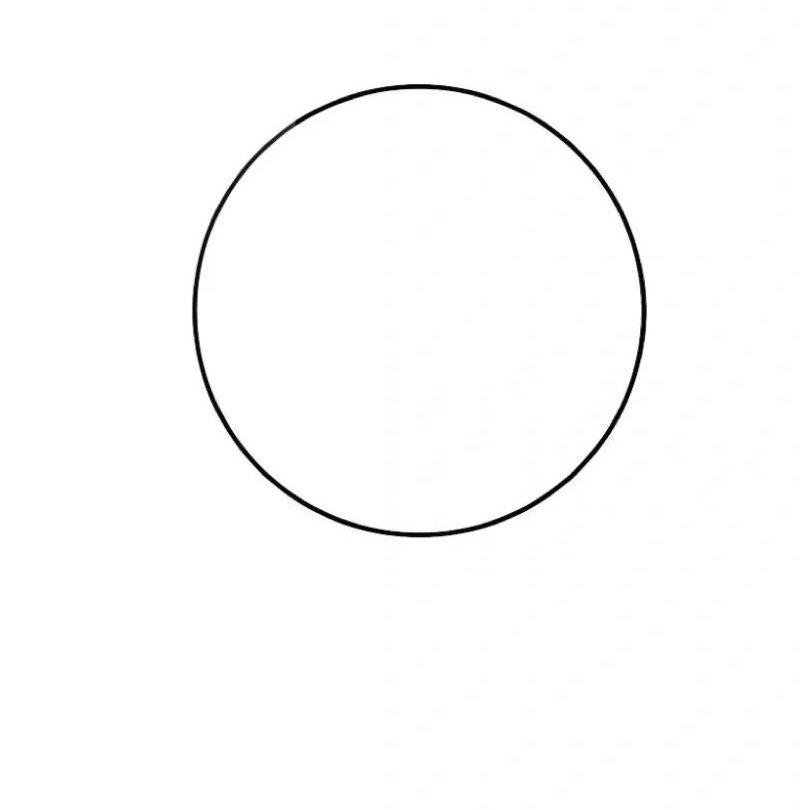
Step 1: Start by drawing a large perfect circle to form the main body of the ladybird – this will be the base for all the other details.
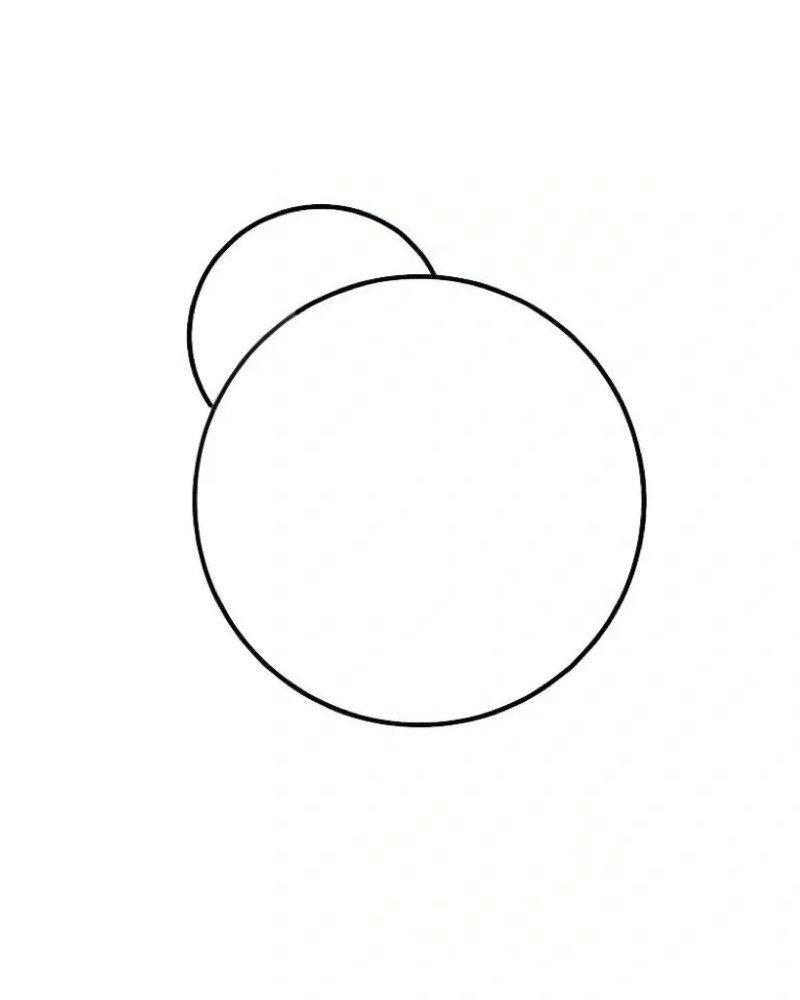
Step 2: Add two small overlapping circles on top of the main body to shape the head of the ladybird and give it a cute rounded look
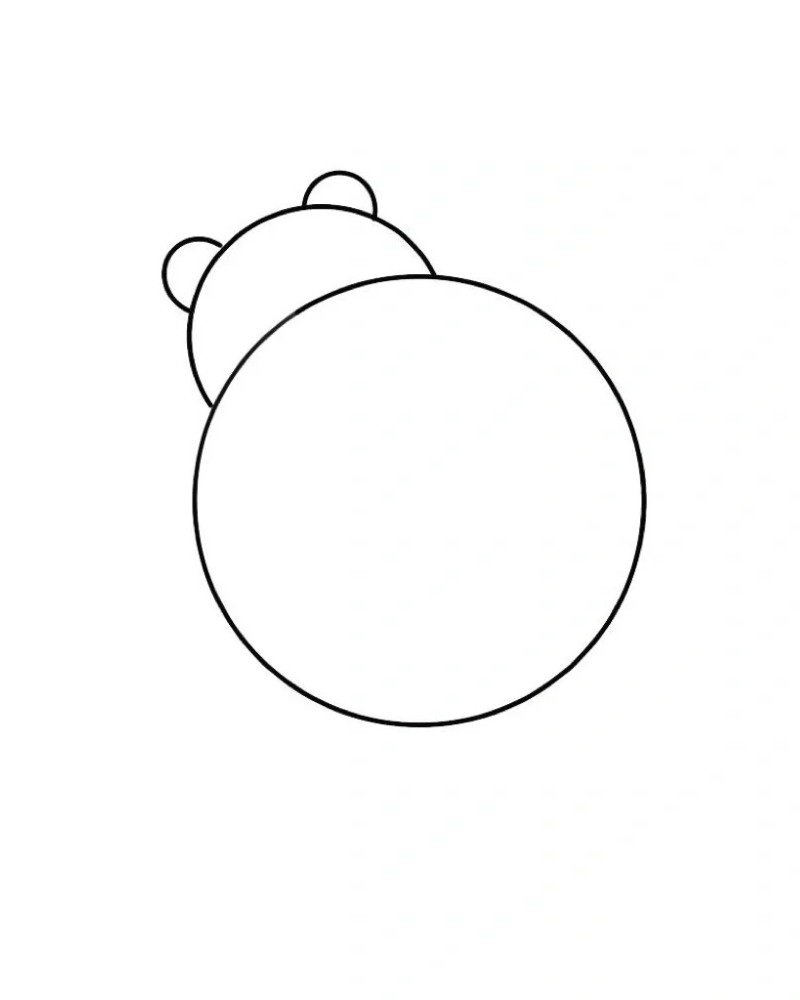
Step 3: Sketch two tiny antennae on top of the head, then lightly draw a line down the center of the body to separate the two wings.
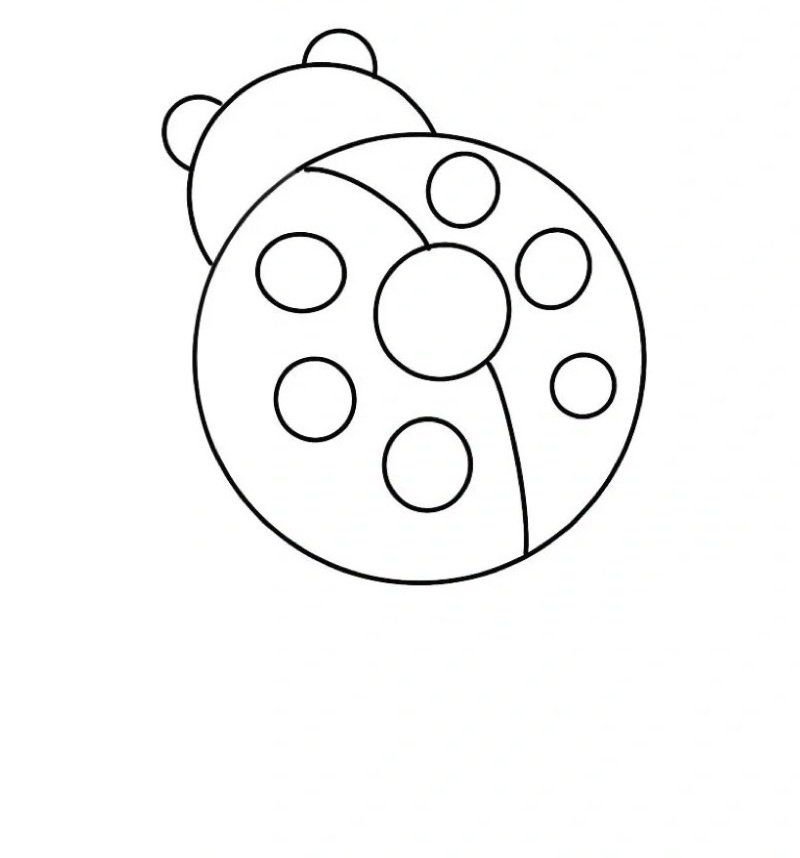
Step 4: Add six small circles inside the body to form the ladybird’s iconic wing spots, keeping them evenly spaced for a neat look.
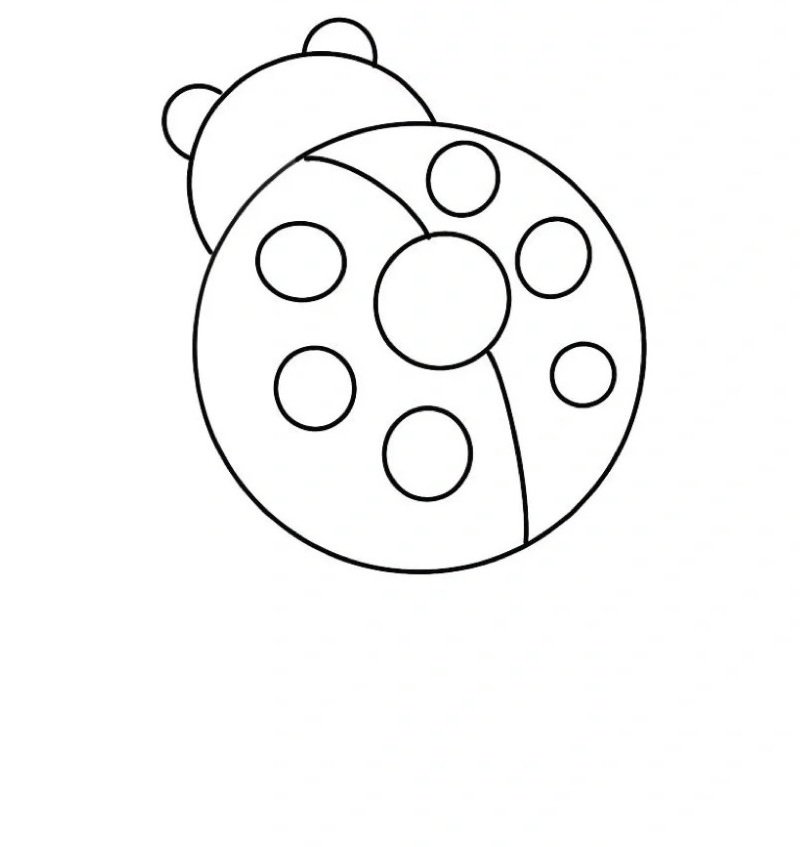
Step 5: Darken the wing outline and the inner spots to bring definition and give the ladybird a bold, finished wing pattern.
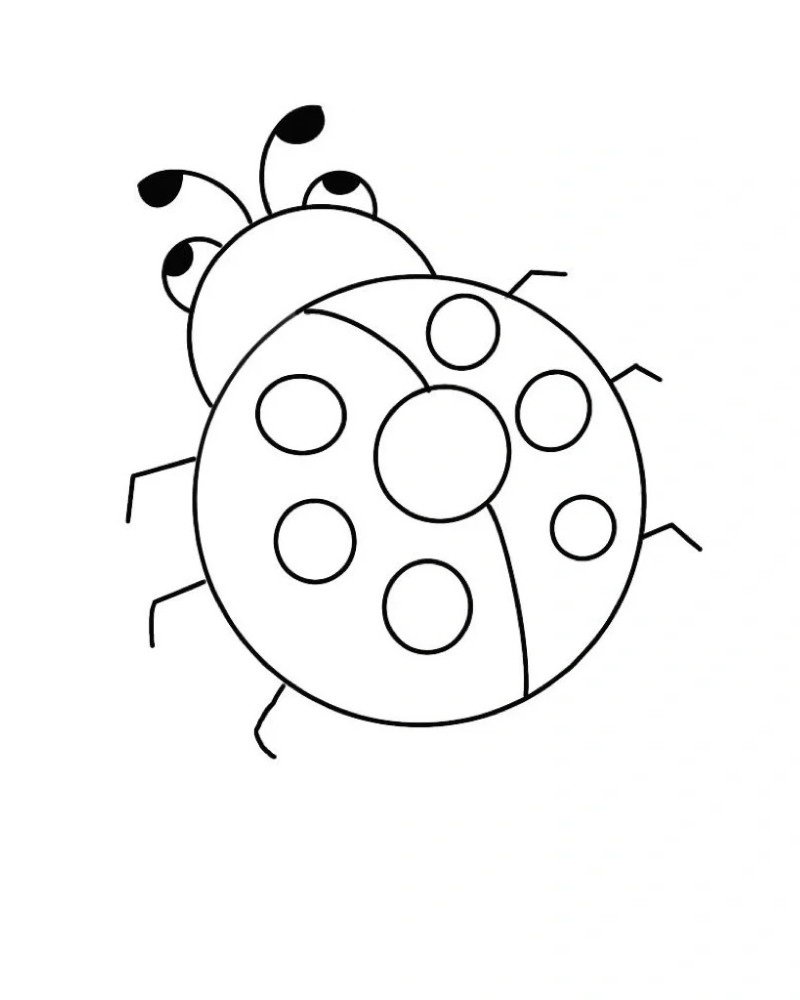
Step 6: Draw six curved legs around the body and two bold antennae to complete your cute ladybird drawing with full character and detail.
How to draw lady bird beautiful
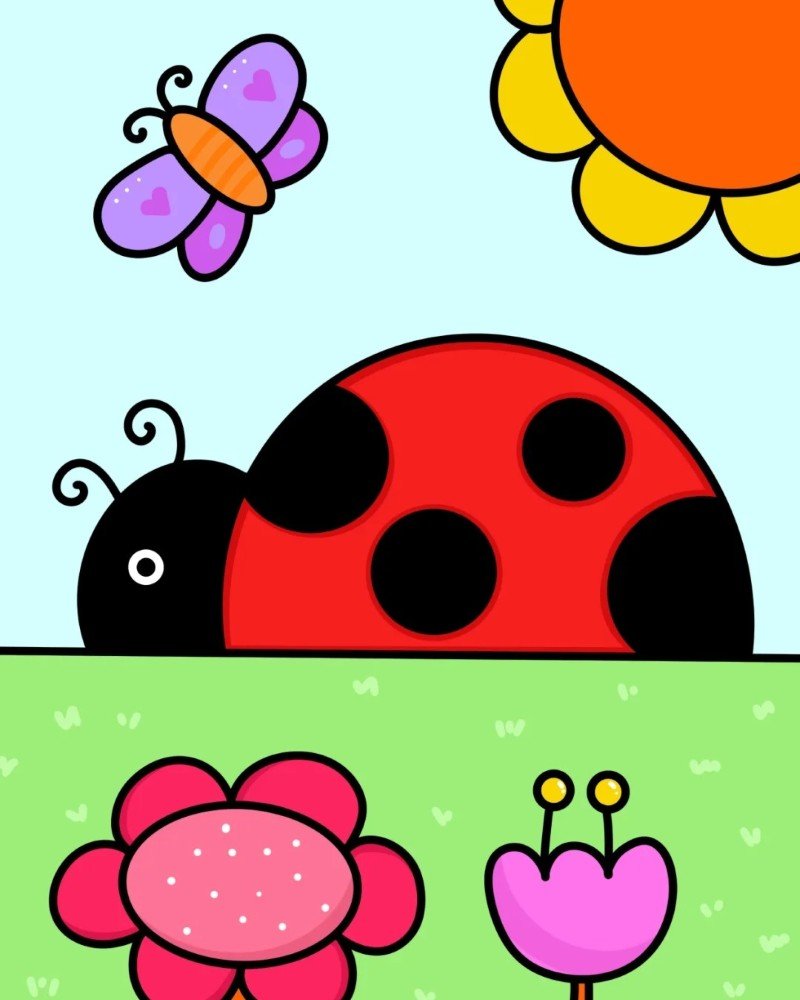
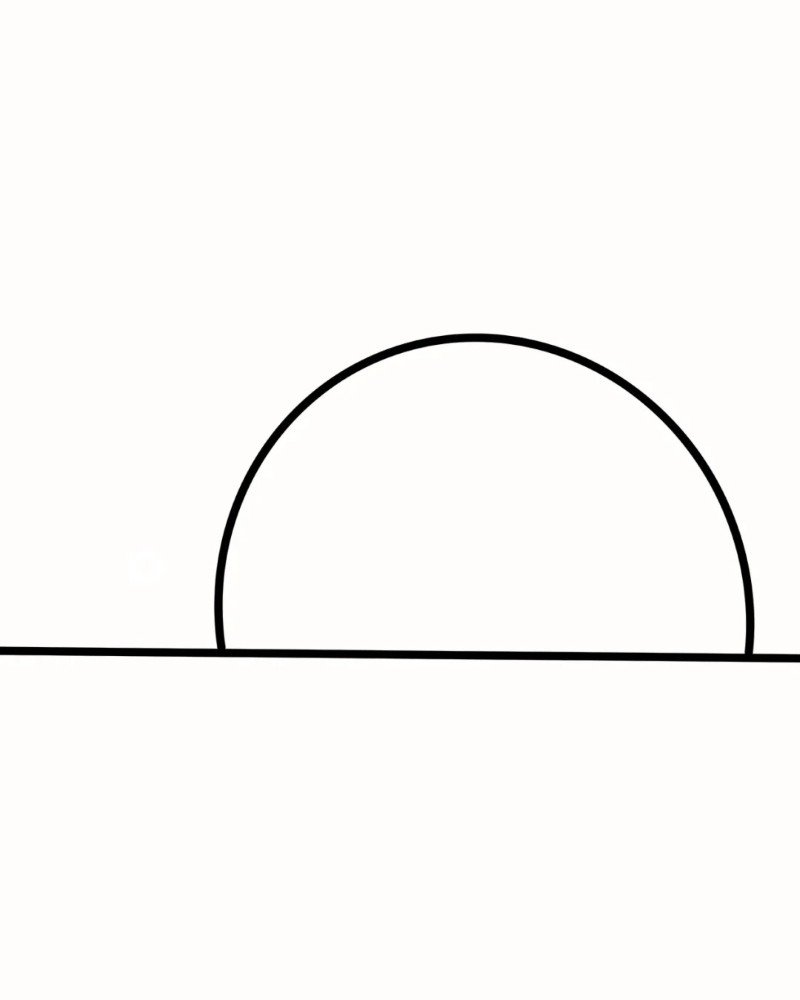
Step 1: Draw a horizontal line for the ground, then sketch a half-circle on top to create the body of the ladybird sitting on the surface.
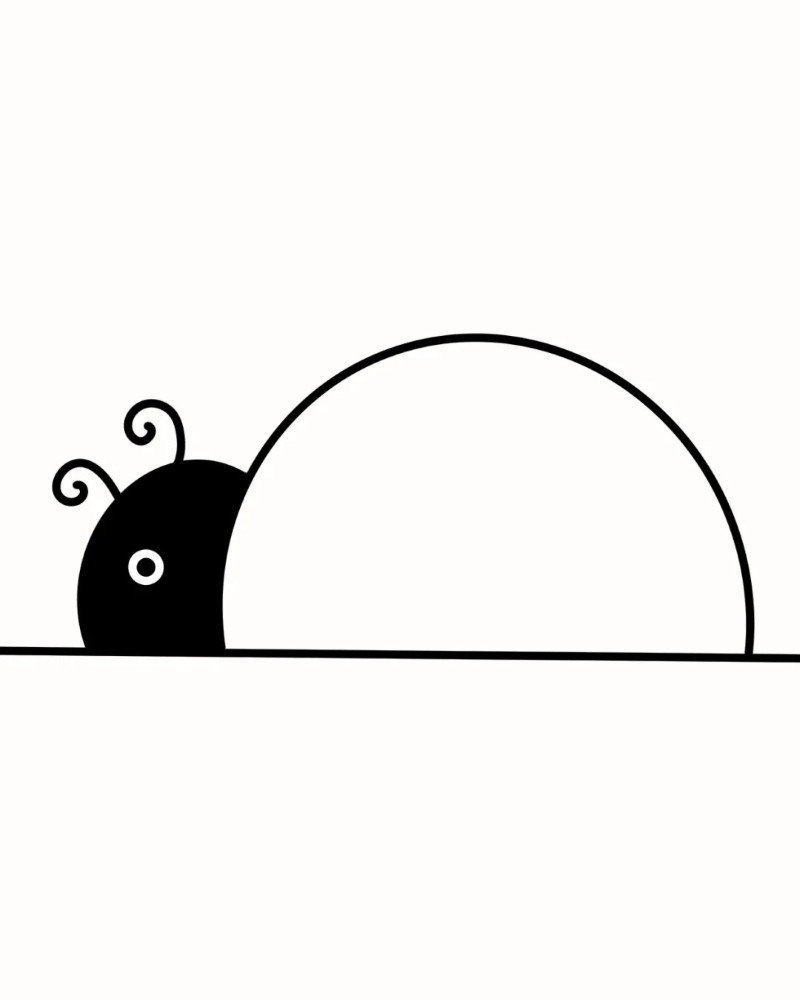
Step 2: Add a small round head, two tiny antennae, and a line down the middle of the body to split the wings for a balanced look.

Step 3: Fill in bold black spots on each wing to represent the ladybird’s signature markings and color in the head for contrast.
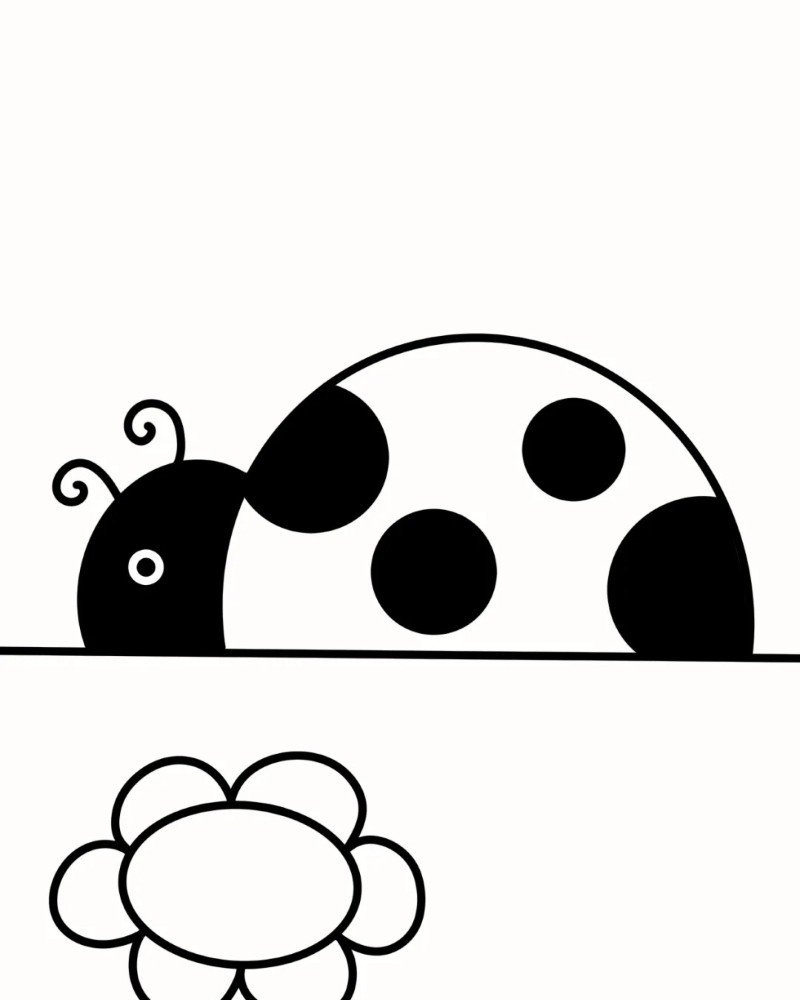
Step 4: Draw two small flowers in front of the ladybird to set a peaceful garden scene and give the drawing a natural setting.
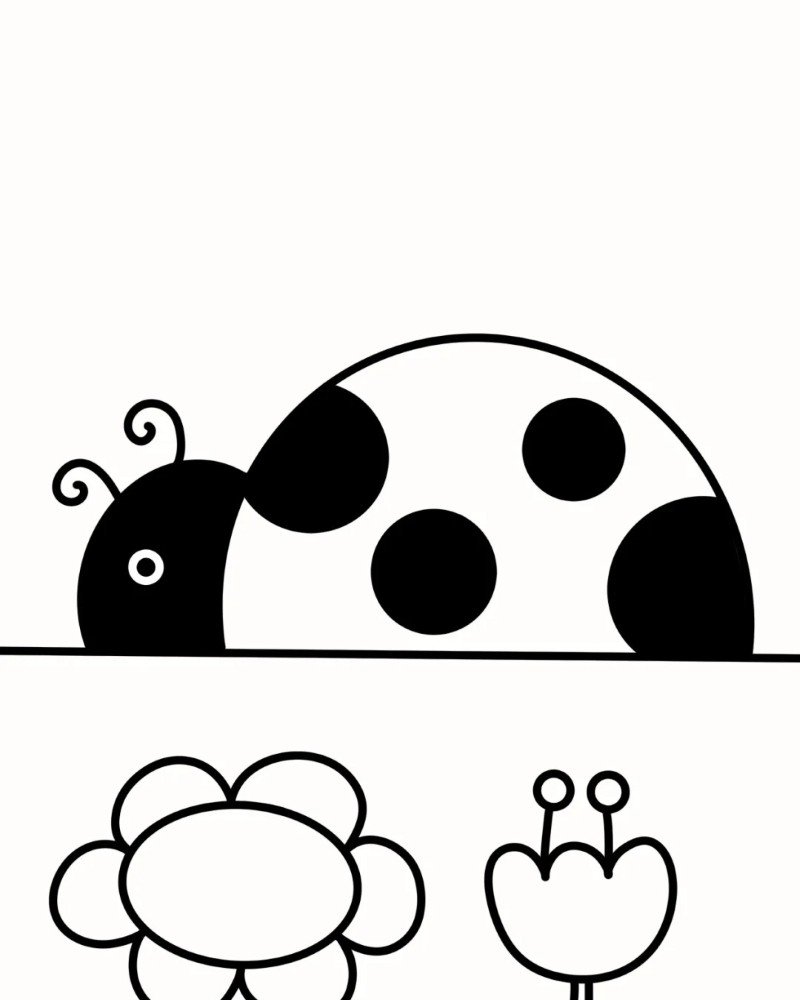
Step 5: Add a third flower and a butterfly flying above to bring more life and movement into the ladybird’s environment.
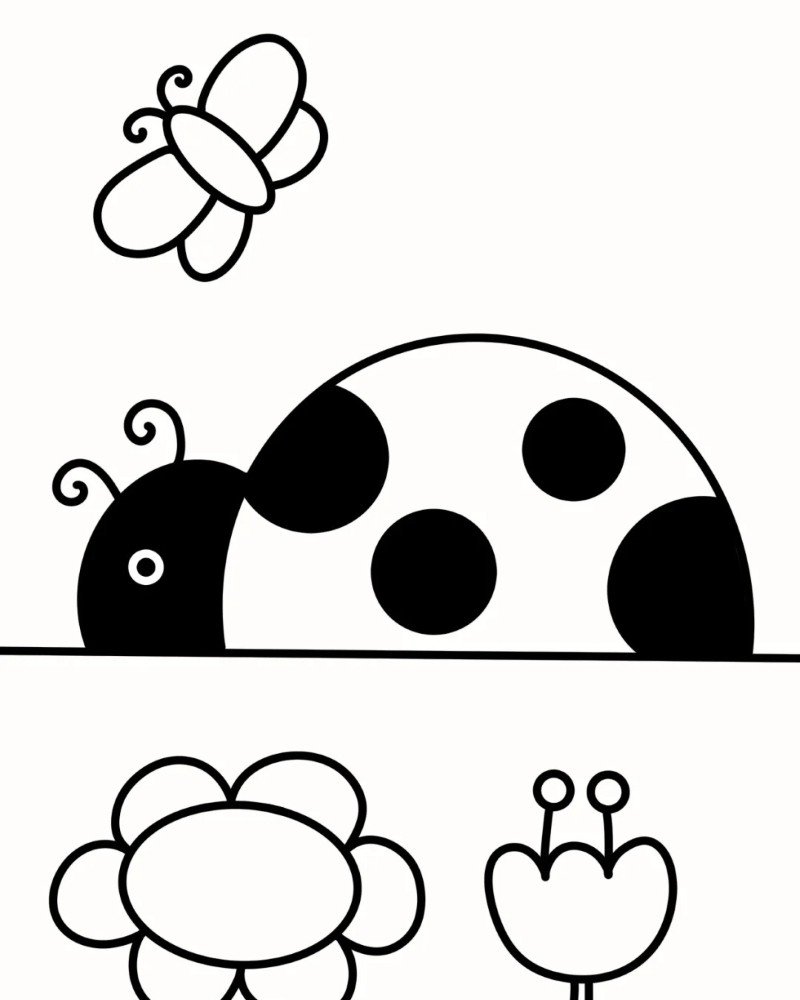
Step 6: Sketch more butterflies and enhance flower petals for extra detail, making the entire scene feel lively and magical.
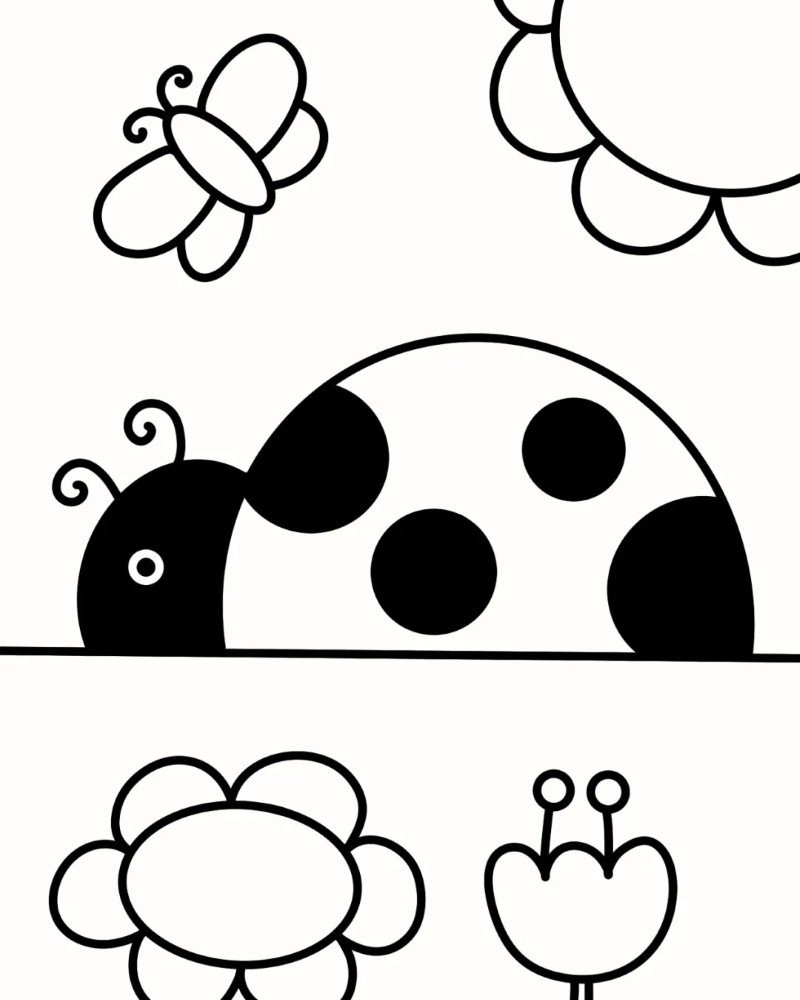
Step 7: Complete the drawing with tall grass blades, a large butterfly, and background details to fully capture a beautiful garden moment.
How to draw lady bird easy


Step 1: Start with a large circle to form the base body of the ladybird. Keep it centered so there’s room for all the upcoming details.

Step 2: Draw a vertical line down the middle of the circle to divide the wings, and add a short line at the bottom to form the tail line.

Step 3: Add two large circles on top for the eyes, slightly overlapping the body, and fill them in to make them stand out with bold expression.
Step 4: Sketch a small curved head below the eyes and refine the center wing line, creating a clear division between the two wings.
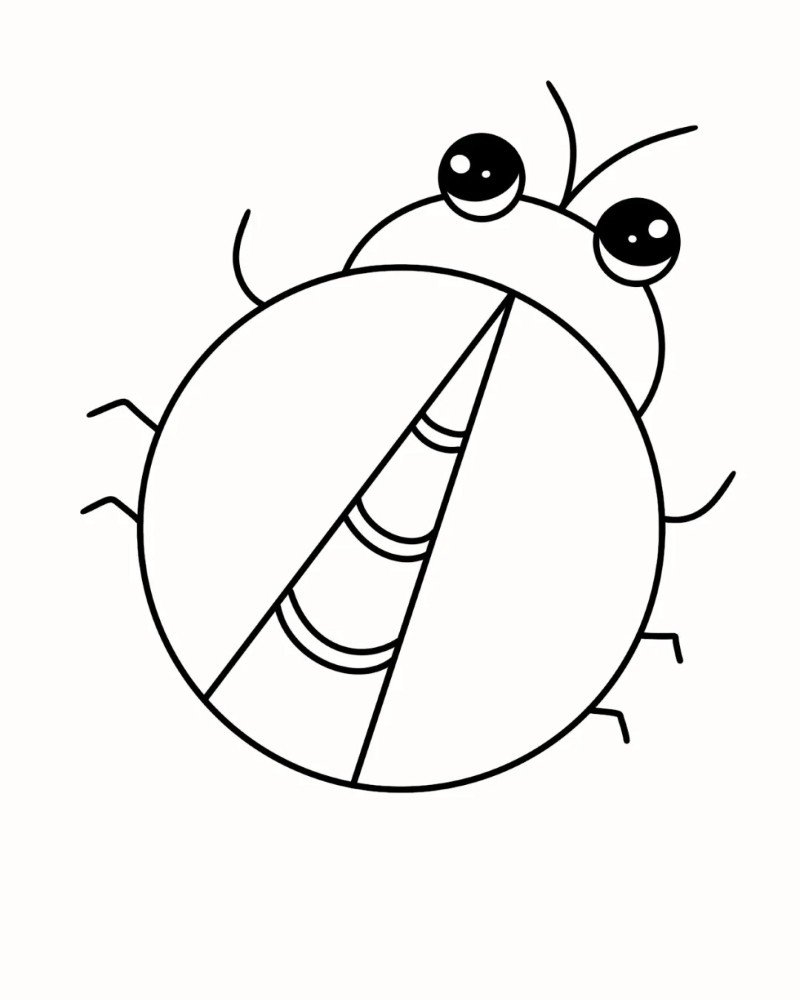
Step 5: Draw two tiny antennae on top, and add three curved legs on each side of the body to make the ladybird look lively and realistic.

Step 6: Add small bold circles for the signature wing spots and give more definition to the lines to bring out the ladybird’s personality.

Step 7: Complete the drawing with a leafy background to place your ladybird in nature, adding texture and contrast to your finished artwork.
How to draw ladybird for kids


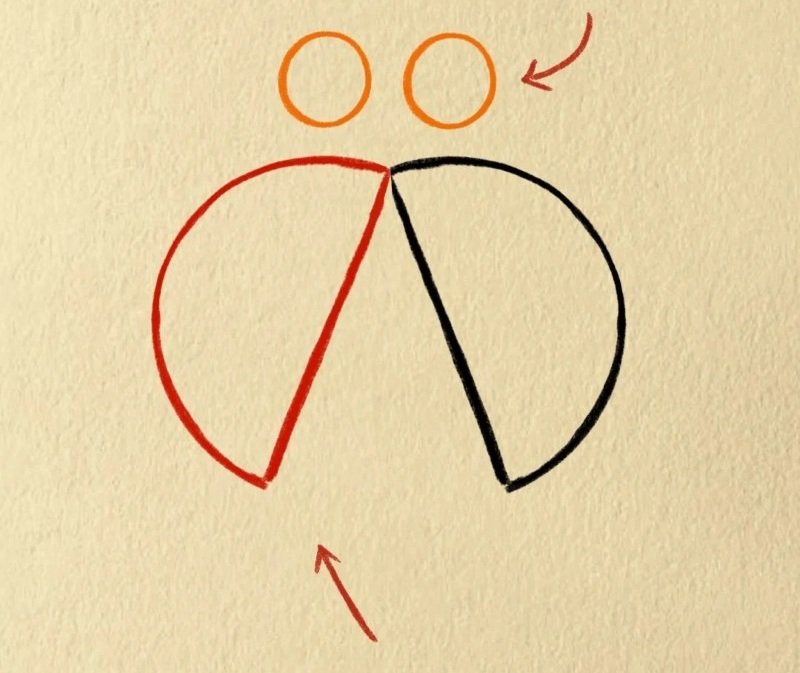
Step 1: Begin by drawing a capital letter A shape in the center — this will be the base structure for the ladybird’s body and guide your proportions.

Step 2: Add a semicircle on top of the A to form the head, and connect both legs of the A with a horizontal line to shape the underbody.

Step 3: Draw two large wing curves on either side of the body by making symmetrical circular lines, giving the ladybird its rounded wings.

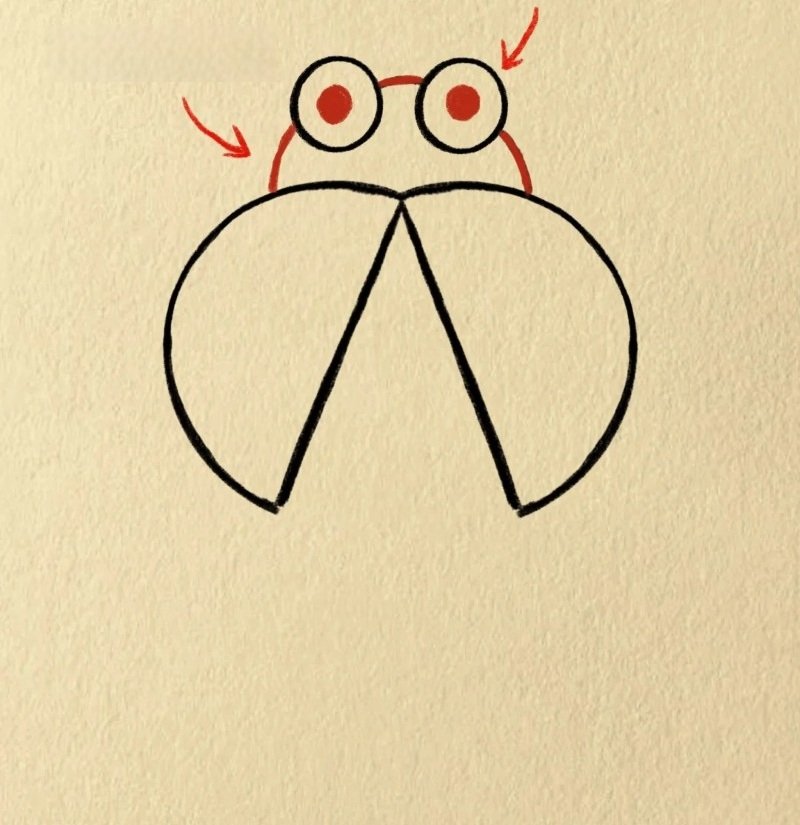
Step 4: Add two small antennae on top of the head and outline the upper part of the wings to begin bringing your ladybird to life.

Step 5: Draw two short eyes, add the ladybird’s mouth and two legs on each side to complete the base look with cute and simple features.

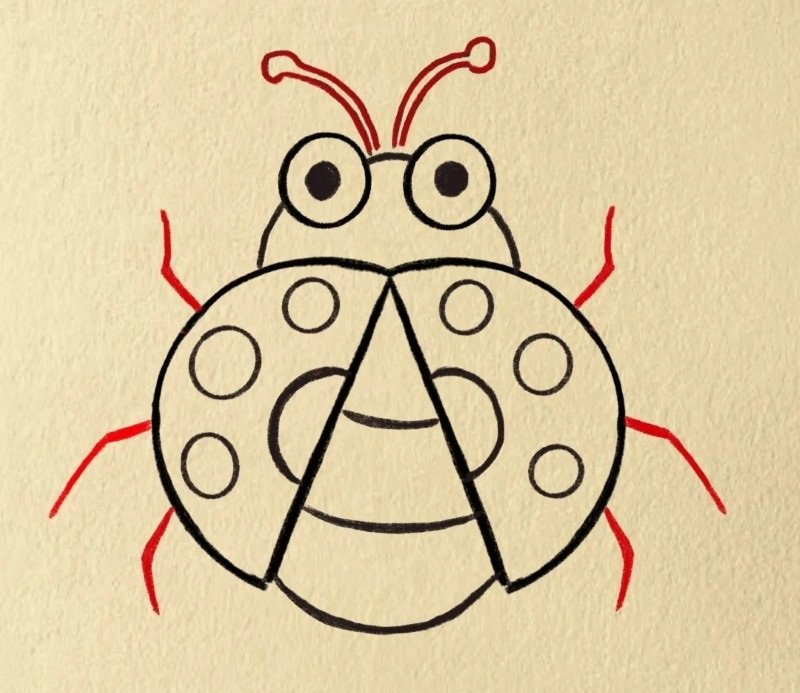
Step 6: Finish by adding red spots on the wings to make your ladybird instantly recognizable and fun, perfect for a kid-friendly design!
See more:
How to draw Iron Man in 8 simple stages for young Marvel fans
8+ fun ways to learn how to draw ice cream for beginners
Top 5+ tutorials that show how to draw Harry Potter step-by-step